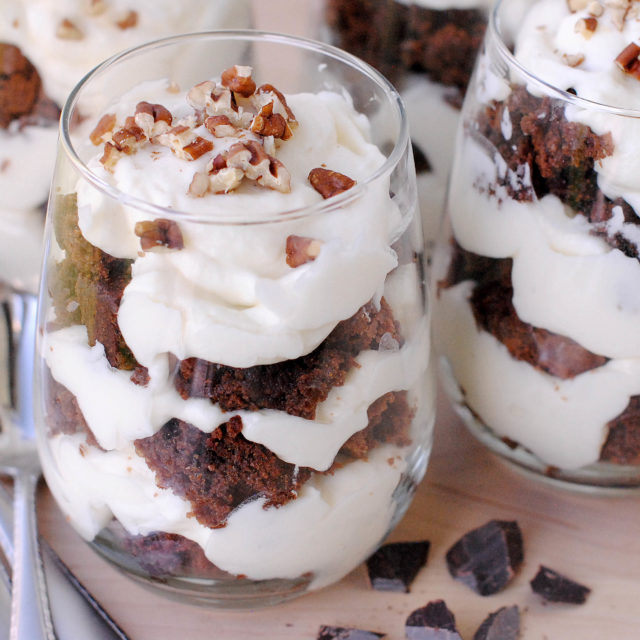
Oh, my! You are gonna love this one! I know it to be true because I can see this dessert with my eyes and smell it with my nose and people have TOLD me how good this tastes. I want this like bees want nectar.
Just because I have a cocoa allergy, does not mean that I don’t want chocolate. In the days before my allergy, I would have been all over a Brownie Parfait. Even now, I wrestle with myself thinking that maybe I could just take a couple of Benedryl and indulge in chocolate once again.
Sometimes, when I am really, really craving chocolate, I eat carob chips. Just so we are perfectly clear, however, carob is NO replacement for real chocolate. As if that was not sad enough, after years of eating carob, I can absolutely state that not all carob chips are created equal. Some of them get crunchy and stringy when they are “melted”. Some of them get kind of grainy and crumbly when baked in cookies. Some of them taste – terrible and stick to your teeth. Some taste… not too bad. NONE of them taste like chocolate, but for a poor, chocolate-starved soul like mine, most of them are at least tolerable.
Lucky you if you get to eat chocolate! Yay!
I mean that sincerely. Allergies are stupid and a waste of time and ridiculously inconvenient. So, good for you if you don’t have to wrestle with a chocolate allergy.
Despite the allergy thing, I seriously wanted to make this dessert. It got stuck in my brain and I had to see it through to the end. My family was extra helpful with this recipe, sampling pan after pan of brownies until I got it right.
Insert true confessions here: I totally messed up one pan of brownies. The batter was all wrong and I couldn’t figure out what was different about it. I baked it off anyway, thinking that maybe everything would work itself out as the brownies baked. Uhhhh, nope. They looked weird when I took them out of the oven. One of my daughters said that they tasted like chalk. They looked a lot like chalk, too. Literally, it wasn’t until I was editing the pictures for this blog post that I figured everything out. I was so busy taking pictures, that I missed TWO ingredients – I had left out the brown sugar (1 cup) and had also left out half of the butter (1/2 cup). So if you want to make chocolate chalk, I have the perfect recipe for you, my friend.
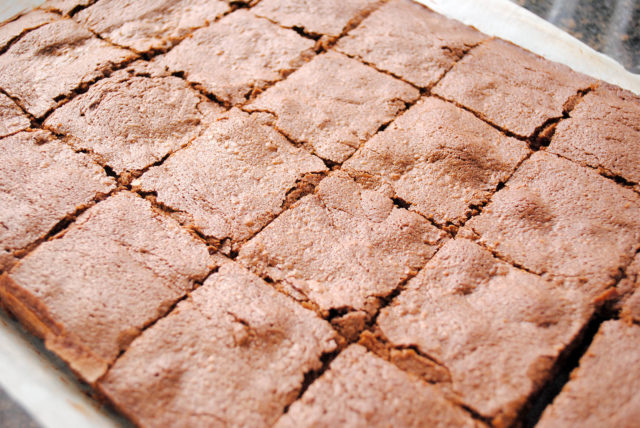
Chocolate Chalk
It took a bit of fiddling with different recipes before I found the one I wanted. I didn’t even try to come up with my own recipe because, hello, I knew that the right recipe already existed – somewhere.
The first recipe I tried was okay, but the texture was not what I was looking for. My grandsons took the resultant brownies home and ate them for breakfast.
I browsed through other recipes, knowing that sooner or later I’d find the right one. All things being equal, I hit pay dirt relatively early…because my daughter introduced me to three recipe candidates. It wasn’t hard to pick the one I wanted – it was the one that looked like it would produce the fudgiest brownie. Foolishly I experimented with the recipe, changing up the chocolate in it. Five pans of brownies later I discovered that the recipe is at its very best when you make it exactly as it is written.
Don’t laugh.
The recipe is by Nick Malgieri, award winning master chef and author of 12 baking and pastry cookbooks. Do yourself a favor and don’t change any of the ingredients in the brownie portion of this recipe. It makes the most delightful, moist, fudgy brownies I have ever not eaten. I bothered my family for two weeks, making them taste pan after pan of brownies just so that I could make that statement.
Use a good quality chocolate.
If you plan to use the brownies as a stand-alone dessert, please finish reading this paragraph. Every single ingredient plays a part in these brownies, so don’t mess with things. Since chocolate is the key flavor here, let’s talk about the chocolate for a moment. Do yourself a favor and get decent chocolate. Please don’t use the cheap stuff. You don’t have to get the chocolate that would cost you as much as a kidney or 10 years of Beverly Hills mortgage payments, but please at least get a respectable chocolate. The quality of the chocolate carries the flavor of the brownie.
You know, now that I think about it, I should get my daughter to do a blog post on various chocolates. She knows her stuff. She even knows real live, honest-to-goodness chocolatiers, like this one and this one, who have taught her a thing or two about chocolate.
If you are making the brownies to be used in this very tasty parfait, then you can slide a bit on the quality of the chocolate. Here’s why. The brownies are in partnership with the creamy layer of, well, whipping cream and cream cheese (or mascarpone, if you are so inclined). I chose to use bittersweet chocolate because it packs more of a chocolaty flavor punch. I also upped the sugar content of the creamy layer because it enhanced the chocolate. I’m told by those in the know that the flavor of this parfait is excellent.
“I Object, Your Honor!”
I really need to interject something here. I feel so weird talking about something I have never tasted. I mean, I tasted the filling, of course, but not the brownies (again, the allergy thing). I’m writing off of memories of what I know chocolate to taste like. Trickier things have been done…like writing an entire symphony when you’re deaf. (Hi Beeth-Oven.) But, I do trust my family. They are pretty experienced eaters and don’t hold back on telling me what’s what.
Recipe Q&A
Can I use all white sugar or all brown sugar in these brownies? Not recommended. It will definitely change the texture of the brownies.
Can I use semi-sweet or milk chocolate instead of bittersweet chocolate? Yes, but lower the content of the sugar in the cream filling. Contrast in sweetness is important. Both semi-sweet chocolate and milk chocolate have a higher sugar content than does bittersweet chocolate.
Will chocolate chips work instead of using chocolate baking bars? Yes, BUT the texture of the brownies changes. They end up being gooier and the flavor is not as chocolaty.
Can I add cocoa to the brownie batter? Yes. However, you should reduce the flour by an equal amount. Example: If you add two tablespoons of cocoa powder, then reduce the amount of flour by 2 tablespoons.
Can I use whole wheat flour instead of white flour? I would not. Whole wheat flour is heavier and will change the texture of the brownies. If you would like to use a whole wheat recipe, consider this one from King Arthur Flour.
Can I use all egg whites instead of whole eggs? Technically, you can, but don’t do it. Egg yolks provide structure, moisture, and richness which cannot be produced by egg whites alone. Here’s an article about egg substitutions in baking at Taste of Home.
How to make Brownie Parfaits
For the Brownies
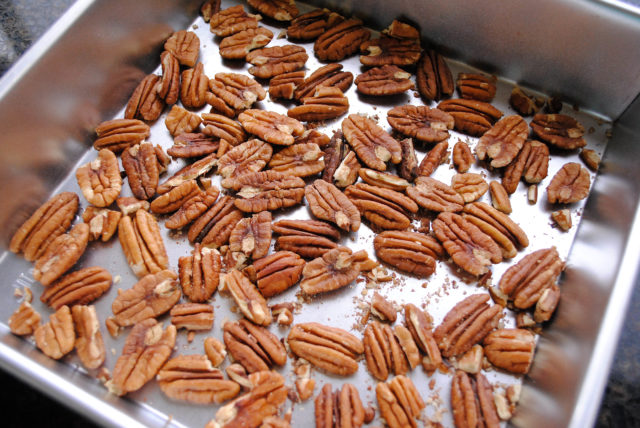
Toast the pecans in a preheated 350-degree F oven. Set them aside to cool, then chop for garnish.
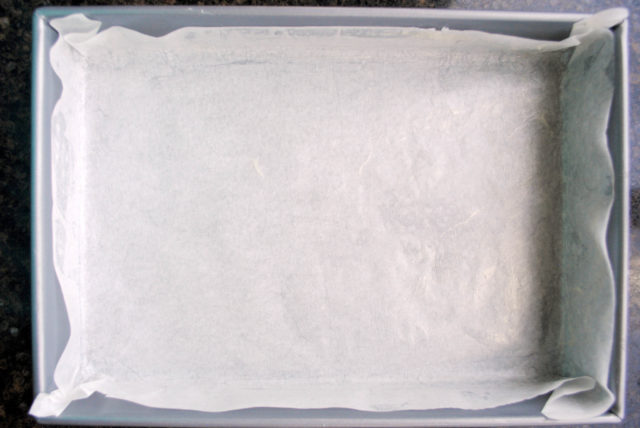
While the pecans are toasting, butter a 9- x 13-inch baking pan. Line with parchment paper and butter the parchment paper. Set pan aside.
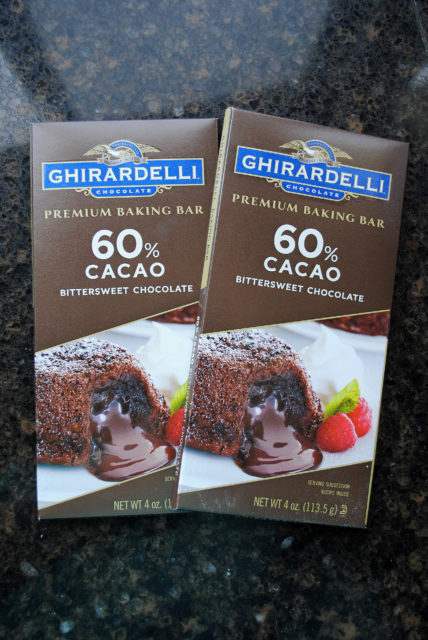
This is the brand of baking bar that I used. I bought them at a small, local grocery store. They handled well and provided a satisfactory level of chocolate flavor for my family. If, however, you are feeding those with very discriminating palates and deeper-ish pockets, then you’ll have to go for pricier chocolate. This is a brownie recipe by Nick Malgieri, so I imagine it could handle whatever higher-end chocolate you want to throw at it. But of course, it glorifies less expensive chocolate beautifully.
If you are serving these brownies as a stand-alone recipe, then semi-sweet chocolate may be a better way to go. For a recipe, such as this Brownie Parfait recipe, I recommend using bittersweet chocolate because it will stand up better to the other ingredients. But, that’s just my opinion.
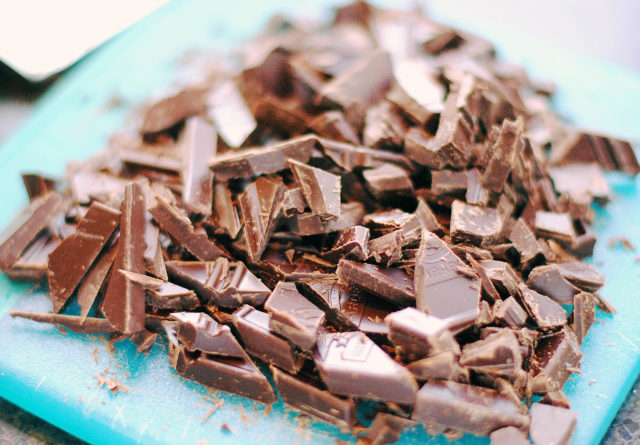
Chop the chocolate bars rather smallish. Big pieces take longer to melt.
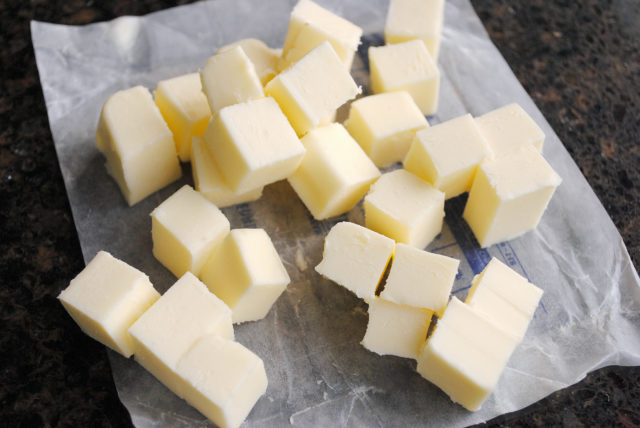
Cut two sticks of cool butter into small cubes. You don’t really have to cut it into small cubes. You can cut it into any shape you want; just make them small pieces, maybe about 1/2″ – 3/4″. I liked the look of the little squares and somehow it gave a sense of order to the whole cutting and chopping thing I had going on with the prep for these parfaits.
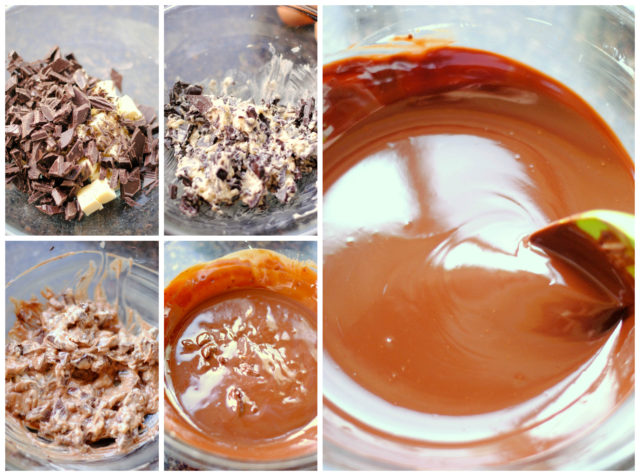
The end goal for the chocolate and butter is to make a beautiful, perfectly smooth, creamy, chocolate soup, like the picture on the far right. Every brand of chocolate is different and will melt at variable rates. Also, the SIZE of the chocolate pieces impacts the length of cooking. Bigger pieces obviously will take longer to melt.
Put the butter and chocolate in a large, microwave-safe mixing bowl. Cook for 30 seconds at 50% power. Stir well. This isn’t going to look like much except butter and chocolate concrete. The ingredients will only seem a little bit softer. Return to the microwave and cook for intervals of 30 seconds at 50% power, stirring well between each interval, until the chocolate and butter are smooth and creamy. For me, in my microwave with the type of chocolate I used and at an altitude of 4500 feet, this took a total of about 2 minutes. For you, it may take less time.
The steps to melting the chocolate in the microwave are important. Don’t rush the process by heating the butter and chocolate on a high power setting. High power will cause the chocolate to burn and/or seize. There’s no coming back from ruined chocolate. Toss it, and start over.
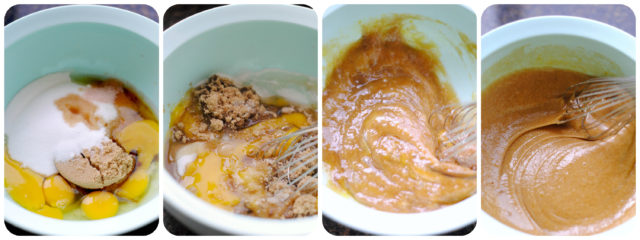
This part is super-duper easy. In a medium-sized mixing bowl, add the eggs, brown sugar, white sugar, vanilla extract, and salt. Whisk together until smooth. This looks like melted caramel.
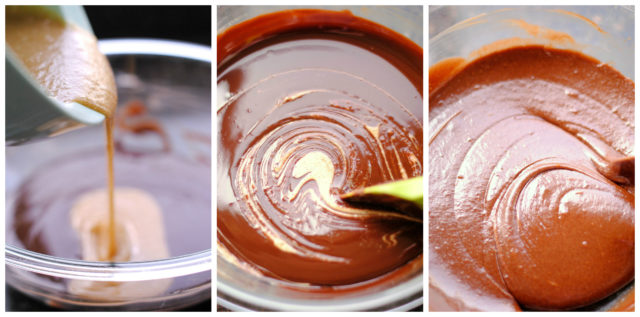
Now take that gorgeous egg and sugar mixture and add it to the decadent melted butter and chocolate. Stir them together with your favorite stirring spoon until well blended.
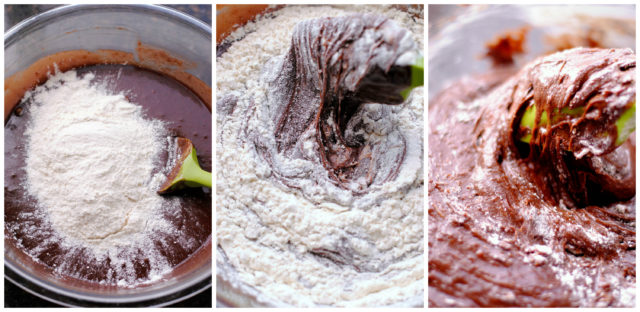
Add the flour and FOLD it gently into the chocolate batter. Fold just until the flour is incorporated.
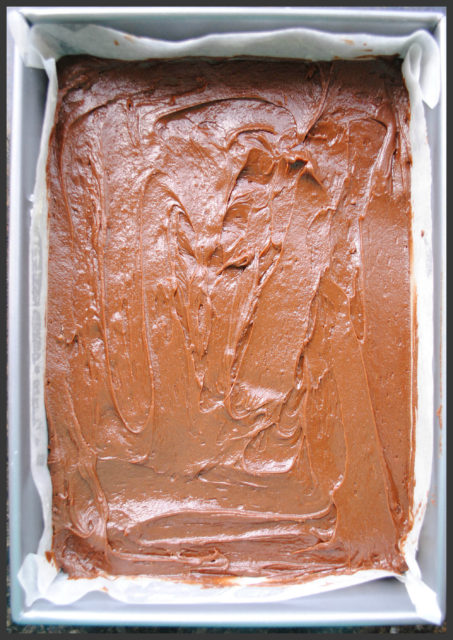
Okay, now add the batter to the prepared pan and spread evenly. I won’t lie, the batter is thick and can be slightly tricky to spread around on top of the parchment paper. However, if you have done a nice job of buttering the pan, then the parchment paper will adhere to the pan and shouldn’t be too much of a problem. I encountered a little difficulty, as you can see, in the corners. No problem; I trimmed the edges off the brownies anyway so that I could get down to nothing but pure brownie.
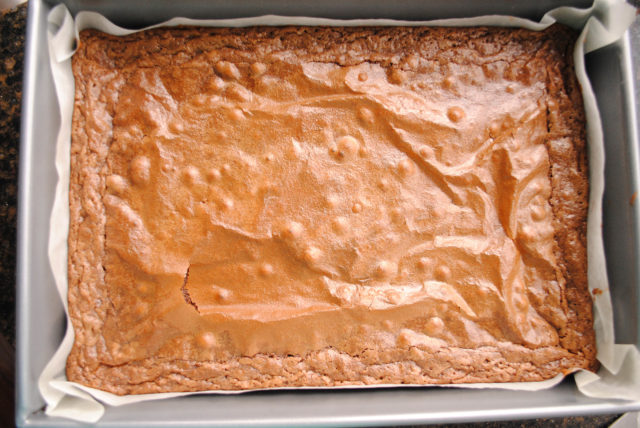
Ta Daaaaa! These have baked on a middle oven shelf for 45 minutes at 350-degrees F. They have a shiny top and are just set, but not hard. Think of them as more on the dense, fudgy side of the brownie world. The edges, of course, are typical – a bit too crispy to serve, so they will be trimmed away. They are great to eat alone, maybe dipped in milk. You could cut them into measured lengths, package them and call them “brownie sticks”. Add a little cup of chocolate ganache for dipping and you’d have cleared the path for your 5 minutes of fame.
Set the pan of brownies aside on a wire rack to cool completely. This will take at least an hour. If you are making the brownies to serve in the parfaits, then they could be baked a day ahead, covered tightly and stored at room temperature or refrigerated. I mean, you could make them a day ahead even if you are going to serve them all by themselves. If you do refrigerate them, be sure to take them out of the fridge at least an hour ahead before serving. Refrigeration does make them quite firm.
For the Cream Cheese Layer
Undoubtedly, some of you will wonder if you could substitute a whipped non-dairy product such as Cool Whip for the whipped cream in this step. Yeah, you could use a filling somewhat like the one used in Chocolate Delight. Yes, you could do that, but you won’t be as happy as you will be with whipped cream. You could call it a “hack” or a “shortcut”; but just remember that in cooking, there is no substitution for the real thing. Real butter is not margarine and real whipped cream is not Cool Whip.

This is my favorite step in the whole brownie parfait process. I just love sweetened whipped cream. It makes me unaccountably happy.
Start by whipping the cream on medium speed for about 30 seconds. Add the 1/2 cup sugar and turn the mixer up to high. Beat until stiff peaks form. This happens rather quickly. Try not to over-beat. Frankly, this is probably the one time you could over-beat the whipped cream and not be shunned by the populace at large because the whipped cream will be beaten with the cream cheese.
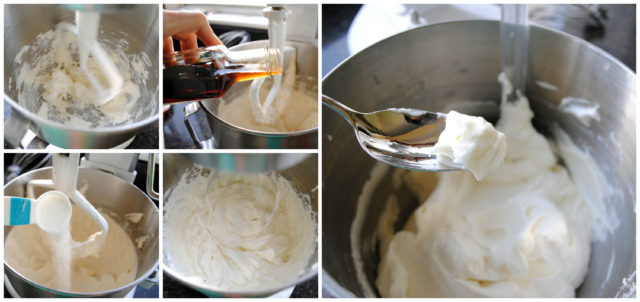
In a large mixing bowl, or the bowl of a stand mixer, beat the cream cheese until light and fluffy. Depending on the firmness of the cream cheese, you can use either the paddle attachment of the whisk attachment. Add the vanilla, 2 tablespoons sugar and the whipped cream. Whisk everything together at high-speed for about 1 minute. It should be light and creamy. Taste and make adjustments as desired, ie. more sugar or more vanilla. Note: you will probably want this to be on the sweeter side so that it will contrast with the brownies, especially if you have used bittersweet chocolate in the brownies.
PS – If you noticed that my bottle of vanilla extract looks “different”, it is because the extract is homemade. I have several bottles of extract, each one made from a different variety of vanilla bean. This particular bottle has a mixture of vanilla beans. I forgot which variety I had originally used, so over time I have added whatever type of vanilla bean I have on hand. As I use the vanilla, I simply top off the bottle with some vodka. (That’s how extract is made – vanilla beans + vodka = vanilla extract). The price of vanilla beans has skyrocketed, which gives me a good reason to get as much mileage out of a vanilla bean pod as possible.
Finishing
We are on the home stretch. Not that it is much of a stretch. It is pure pleasure, making these parfaits.
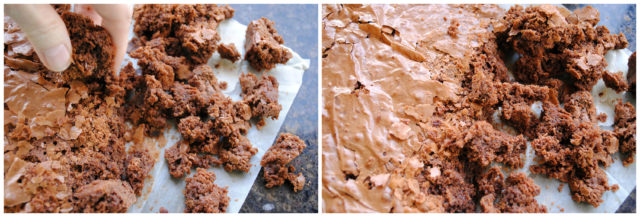
Using the edges of the parchment paper, lift the whole sheet of brownies from the pan and place them on your work surface. Trim away the hard edges with a sharp knife. With your hands, break up the brownies into bite-sized pieces.
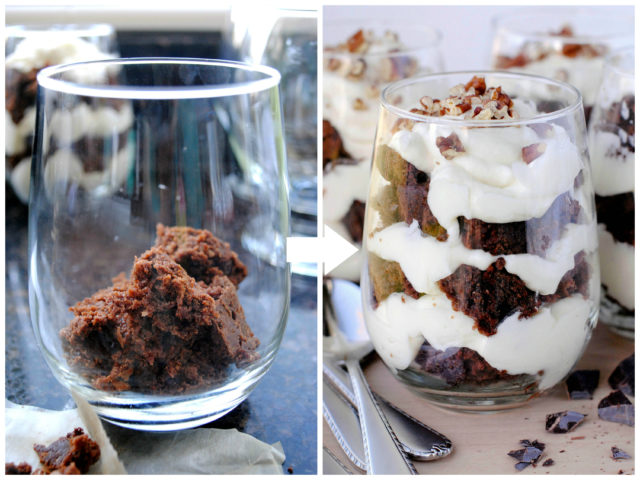
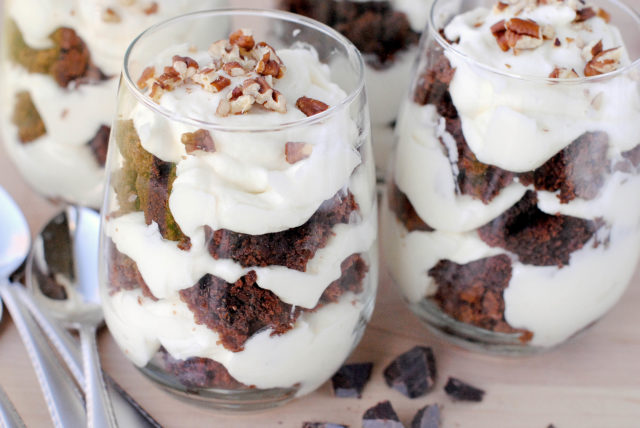
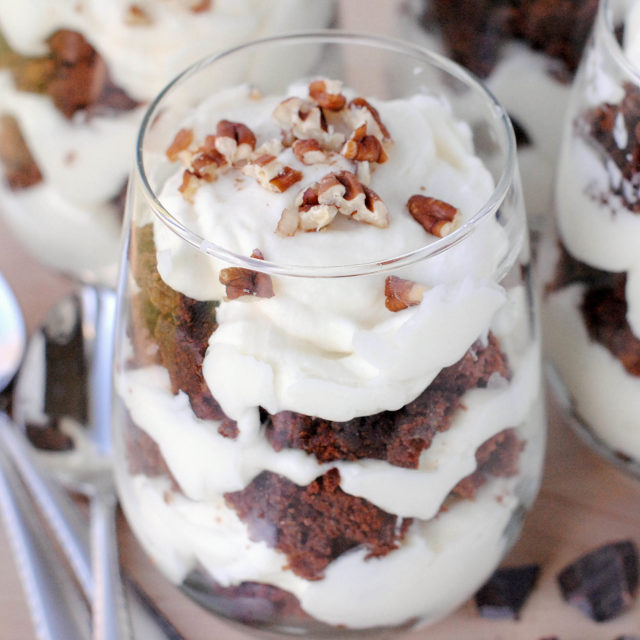
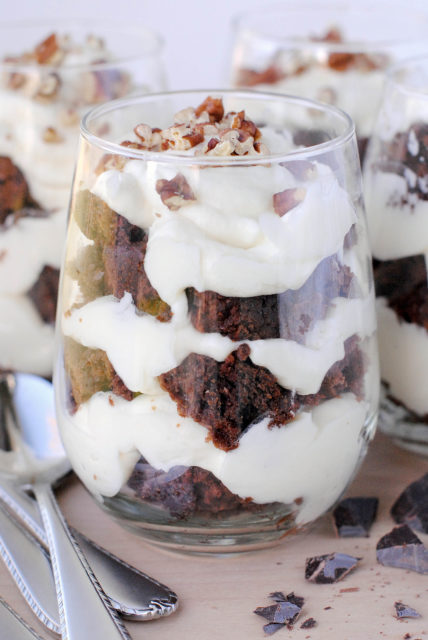
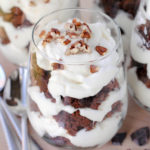
Once you have the brownies broken up, start assembling the parfaits. This recipe will make 6 (8-ounce) parfaits or 4 (12-ounce) parfaits. Go for the 8 ounce size. In my personal opinion, 12 ounces is just too large. Depending on the shape of your container, you will probably get 4-6 layers. Without thinking, I accidentally used a 12 ounce container in these photos, hence the 6 layers – 7 if you count the pecan garnish.
Lay down a layer of brownies first, then a layer of the whipped cream/cream cheese mixture. Keep layering until you reach the top. Sprinkle with chopped pecans to finish. Cover and chill for at least 1 hour before serving.
Brownie Parfait
Ingredients
- 1/2 cup pecans
For the Brownies
- 8 ounces (weight) bitter sweet chocolate cooking bars, chopped into small pieces (I used Ghiradelli bittersweet baking bars)
- 1 cup unsalted butter, cut into pieces
- 4 large eggs
- 2 teaspoons vanilla extract
- 1 cup white, granulated sugar
- 1 cup firmly packed dark brown sugar
- 1/2 teaspoon sea salt
- 1 cup all-purpose flour
For the Filling
- 2 cups heavy whipping cream
- 3/4 – 1 cup white, granulated sugar, divided
- 8 ounces (weight) cream cheese
- 2 teaspoons vanilla extract
Instructions
To Toast the Pecans
- Place oven rack in center of oven. Preheat oven to 350-degrees F. On a baking sheet, spread pecans in a single layer. Bake until pecans are lightly toasted and fragrant, about 5-7 minutes. Be careful not to over-cook. Chop when cooled. Note: Leave oven set at 350-degrees F to bake the brownies.
For the Brownies
- Lightly butter a 9- x 13-inch pan. Line pan with parchment paper; butter parchment paper. Set prepared pan aside.
- In a large microwave-safe bowl, melt together the chopped chocolate bars and butter at 50% power for 1 – 2 minutes or until melted and smooth. Stir at 30 second intervals.
- Whisk the eggs and vanilla together. Add the egg mixture, white sugar, brown sugar, and salt to the chocolate mixture. Whisk to blend well. Add the flour and stir, just until blended.
- Add the flour and fold into the chocolate mixture, just until blended.
- Pour into prepared pan and bake for 45 minutes. The top of the brownies will be shiny and the center will be set. Remove from oven. Set pan on a wire rack and cool brownies completely, at least 1 hour. (See Notes)
For the Filling
- In a large bowl, beat whipping cream and 1/2 cup sugar until cream forms soft peaks.
- In the bowl of a stand mixer, beat together the cream cheese, 2 tablespoons sugar, and vanilla extract until light and fluffy, about 5 minutes.
- Add the whipped cream to the cream cheese mixer. With the whisk attachment in place, whip the cream cheese mixture and the whipped cream on speed 3 or 4 until well blended, about 1 minute. Taste for sweetness. If needed, add additional sugar, up to an additional 1/4 cup. You want this to be sweeter than the brownies to add flavor contrast, particularly if you have used bittersweet chocolate in the brownies.
To Assemble Parfaits
- Set out 6 (8 ounce) glasses or dessert dishes of choice. The brownies and cream cheese mixture will be layered in the glasses.
- To Layer: Crumble the brownies into chunky pieces. Divide half of the brownie crumbles equally among the 6 glasses. Using half of the cream cheese mixture, spoon equally over the brownie crumbles in each glass. Layer with the remaining brownie crumbles and repeat with the remaining cream cheese mixture.
- Sprinkle toasted pecans over the top of each parfait. Cover and chill for at least 1 hour before serving. Alternatively, these parfaits can be made a day ahead, then covered and chilled for up to 24 hours.
Notes
- Substitute Blondies for the brownies. Use toasted macadamias and toasted coconut as toppings or as part of the layers.
- Use macerated raspberries, pulverized, then strained through cheesecloth as a sauce for the parfait. Whole berries would be pretty for a topping.
- Any soft bar cookie or dense cake could be substituted for the brownies.
- Use softened ice cream instead of the cream cheese/whipped cream mixture. Wait until serving time to assemble the parfaits.


Leave a Reply