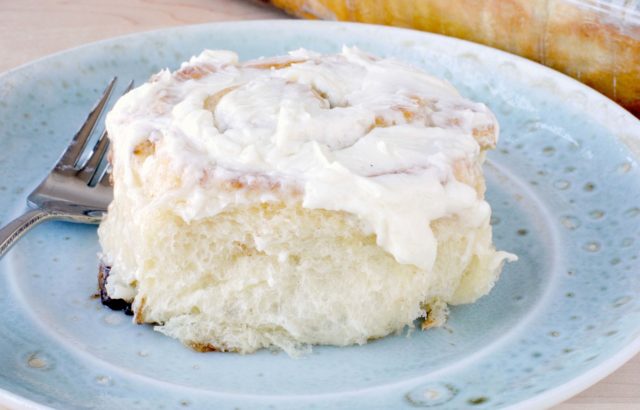
Hands down, these are the best cinnamon rolls I have ever made or eaten. Light and tender and perfect.
Time for true confessions: I have always struggled with making good cinnamon rolls. I kept searching for a light and tender roll, but mine were always heavier than I wanted them to be. Even when I took care with the dough, my cinnamon rolls were disappointing. Maybe I am hard to please. But, I am not going to think about that right now.
Instead, I am going to be happy because I truly believe that I have found the cinnamon rolls that were meant for me. Everybody needs that kind of cinnamon roll – one that is made just for them.
I used my mother in-law’s No-Knead Dinner Rolls recipe with the same modifications that I used for my last post, No-Knead Cheesy Bread. Coconut oil replaced the vegetable oil that I normally use in the dinner roll dough. It is my absolute favorite oil to use when making yeast breads or rolls. I don’t know what it does to the dough, but it is magnificent.
The whole process of making these cinnamon rolls is very easy, especially since the dough does not require any kneading. Add the ingredients to a large bowl and stir, cover the dough with some plastic wrap and walk away for an hour. This is a super easy yeast dough for beginners; success is pretty much a given.
One of the best things about these cinnamon rolls is the filling, I used brown sugar, cinnamon and butter. I have always used white granulated sugar, so brown sugar was new for me. I knew that the filling was going to be great, but what I didn’t count on was the “caramel” that formed beneath the rolls as they cooked. Wow, that stuff was good!
The Frosting
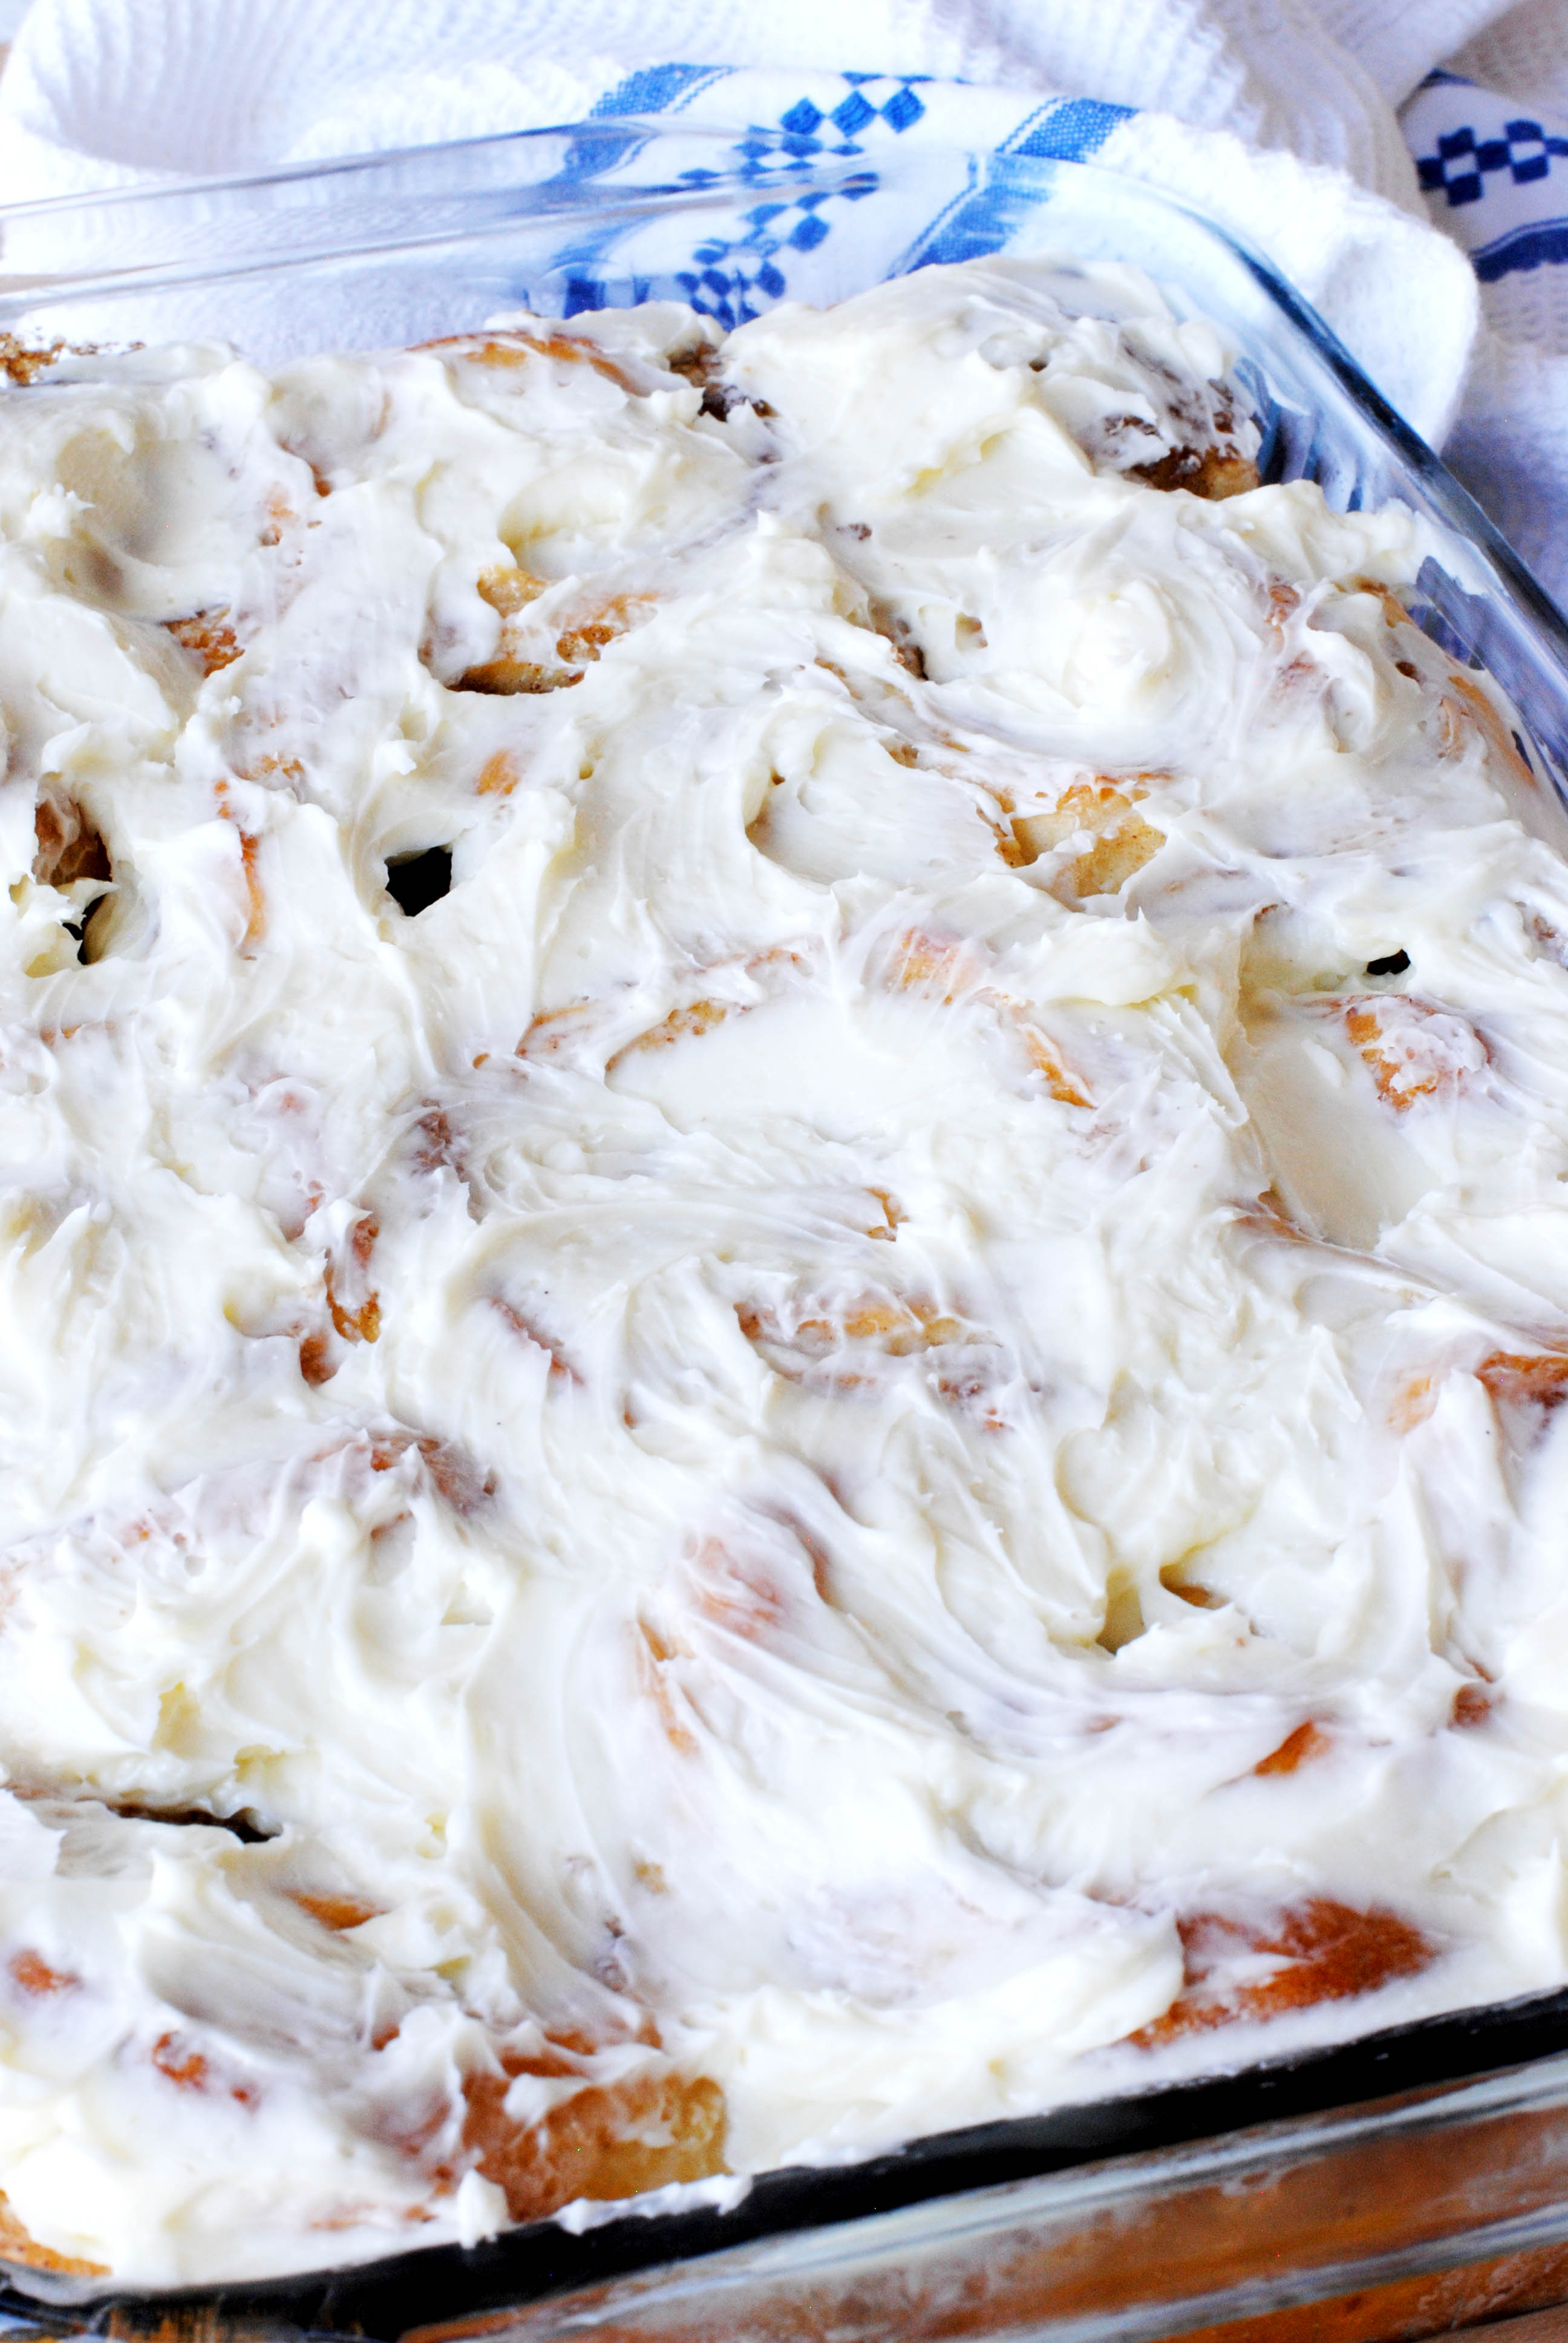
And then there’s the frosting. In the first batches of cinnamon rolls that I made, I used a standard cream cheese frosting. By the time I made the third batch, I had run out of cream cheese and did not have time to go to the store to get more. In what turned out to be a lovely serendipitous moment, I substituted a modified buttercream frosting for the cream cheese frosting… and went straight to heaven with the first bite.
I put less powdered sugar in the buttercream than I normally would and it ended up tasting more like a Swiss Buttercream frosting. It was less intense than the cream cheese frosting and I found that it complemented the cinnamon roll very well. All of the elements came together like a trio of angel sisters – the tender, airy roll itself; the brown sugar and cinnamon filling that tastes like cinnamon caramel; and the softly sweet buttercream frosting. It’s all perfectly, addictingly balanced lusciousness.
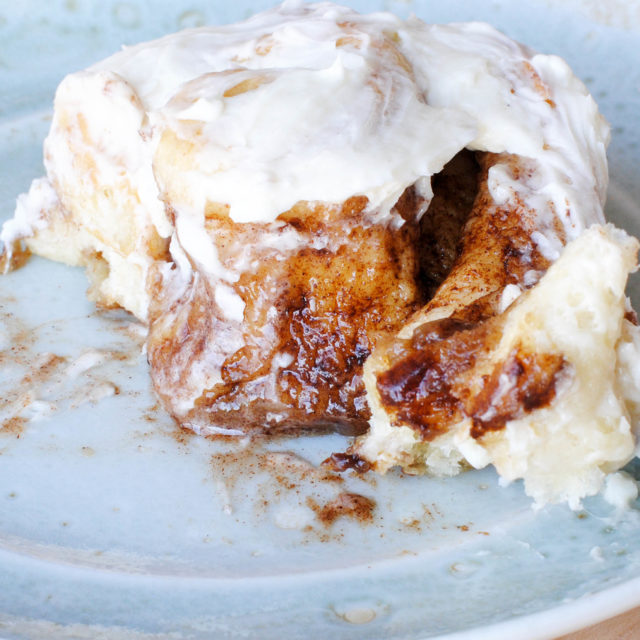
You see that center right there? That is the most divine part of a cinnamon roll, the heart. That is where the gooiest, most intensely flavorful part of the cinnamon roll resides. Smack dab in the middle of glory.
No-Knead Cinnamon Rolls
Ingredients
For the Dough (This is enough for TWO pans of cinnamon rolls. Alernatively, you can make one pan of cinnamon rolls and use the remaining dough for other recipes, such as Cheesy Bread, pull aparts, Dinner Rolls, or fried scones.)
- 2 cups warm water (about 105 degrees F)
- 2 tablespoons active dry yeast
- 3 whole eggs
- 1/2 cup white, granulated sugar
- 1/2 cup melted coconut oil
- 1 teaspoon salt
- 6-7 cups white, all-purpose flour
For the Filling (This is enough for ONE pan of cinnamon rolls. Double it for two pans.)
- 1/2 cup butter
- 1 cup brown sugar
- 1 tablespoon ground cinnamon
For the Frosting
- 1 cup butter
- 2 cups powdered sugar
- 1 teaspoon vanilla extract
- 2 tablespoons heavy cream
- up to 1/4 cup whole milk
Instructions
For the Dough
- In the warm water, dissolve the yeast and a pinch of sugar. Set aside until activated and foamy, about 5-10 minutes.
- To a large mixing bowl, add the 3 eggs. Whisk lightly.
- To the eggs, add the sugar and salt. Whisk together until blended. While continuing to whisk, pour in the melted coconut oil. Add the activated yeast and water mixture and whisk together to combine.
- Add 3 cups of flour and stir to blend well. The batter does not have to be completely smooth. Small lumps are okay.
- Add an additional 3 cups of flour and stir to incorporate all of the flour.
- Continue to add a little flour, maybe 1/4 - 1/2 cup, at a time to the mixture, stirring after each addition. Only add flour just until the dough starts to leave the side of the bowl and starts to lose its shiny "wet" appearance. The dough will become heavier and more difficult to stir. The dough will be somewhat slack, rough looking and sticky, but not gooey as it was with only 6 cups of flour. It may be difficult to stir and you may have to use your hands to incorporate the flour at the very end. Sometimes I can manage with a strong spoon and sometimes I cannot. (Please see Notes section about adding flour.)
- Cover bowl with plastic wrap and set aside in a warm place to rise until double in bulk, about 1 hour, depending on the warmth of your kitchen. Alternately, the covered bowl can be placed in an oven with only the oven light turned on. (NO HEAT!). The light bulb warms the air in the oven.
- Punch dough down and let it rest in the bowl for 5-10 minutes. Divide dough in half. Leave one half in the bowl and cover with plastic wrap. Place the half on a lightly floured countertop. Gather the dough into a ball. Again, the dough will be slack, but will loosely hold the ball shape.
- Line the bottom a 9- x 13-inch baking dish or pan with parchment paper. (See Notes.) Butter the sides of the dish or pan well. Set aside. Note: If you do not have parchment paper, be sure to butter the bottom of the dish or pan well. As the cinnamon rolls bake, the filling tends to melt under the rolls and can cause sticking.
- Lightly sprinkle the top of the dough with flour. With a rolling pin, roll the dough out into a 16- x 12-inch rectangle. If the dough is resistant to being rolled out and shrinks back together, allow it to rest for 5-10 minutes and then proceed with rolling. Sprinkle a little flour on the top of the dough if it sticks to the rolling pin.
- For this step, the butter needs to be very soft. Spread the butter evenly over the dough, keeping an approximately 1-inch border of dough around the edges clear.
- In a small bowl, whisk together the brown sugar and cinnamon. Sprinkle over the buttered dough, again avoiding the edges of the dough.
- Starting on one long edge, roll up the dough into a log shape. With a serrated knife or a 24- to 36-inch length of unflavored dental floss or string, cut the dough into twelve rolls.
- Place rolls, swirl side up, in the prepared baking dish, 3 across and 4 down. You may have to snuggle them together, but they will all fit. Repeat process with the remaining dough or reserve for another use. This dough can be refrigerated for up to five days. Cover the dish with plastic wrap and place in a warm place to rise, about 45 minutes to one hour.
- Near the end of the rising time, preheat oven to 350-degrees F. Bake rolls until a light to medium golden brown, about 18-20 minutes. Remove from oven and place dish on a cooling rack.
For the Frosting (This is enough for ONE pan of cinnamon rolls. Double the recipe for two pans.)
- While the rolls are cooling, make the frosting. In a medium bowl, beat the butter with a hand mixer for two minutes.
- Add the powder sugar. With the mixer on low, begin mixing the butter and powdered sugar together. As the two ingredients start to come together, increase the speed of the mixer and mix well.
- Add the vanilla and the heavy cream. Blend well. Begin adding the milk a tablespoon at a time, mixing after each addition. Continue adding the milk until the frosting is at a spreading consistency. In some cases it may take more than 1/4 cup of milk.
Finishing
- When the cinnamon rolls have cooled for about 10 minutes, spread a thin layer of the frosting over the top of the rolls. This will mostly melt into the rolls. Set the rest of the frosting aside until the rolls have almost completely cooled.
- Once the rolls are almost completely cool (the middle of the underside of the baking dish can still feel a little warm to the touch), frost the tops with the remaining frosting.
- Serve as desired. Keep leftovers covered with plastic wrap. Do not refrigerate.
Notes
- Adding Flour to the Dough: If you live in a humid climate, most likely you will need to add up to 7 1/2 cups of flour. I live in a dry climate and usually add just under 7 cups of flour. On the occasional humid day, I do have to add more flour.
- About the Dough Texture: This is a stickier type of dough than an average yeast bread or roll dough. The finished dough will be lumpy and coarse looking and will stick to the bowl. There may be a slight shine to the dough, but it should not be very shiny. It will be loose and mostly will not hold its shape. During the rising process, the dough will strengthen. The dough will be quite "soft" and moderately sticky. It will be able to hold its shape a little better, but still not as well as an average yeast roll dough.
- Baking Dish: For these particular cinnamon rolls, I had best results baking them in an oven-safe glass 9- x 13-inch baking dish.
- Frosting: For the final layer of frosting, I warmed the frosting in the microwave for a few seconds to help it spread easier.
- Storing Leftover Dough: Leftover dough can be covered and refrigerated for up to 5 days. I can be used to make Dinner Rolls, pull aparts, Cheesy Bread, fried scones, etc.
If you’d like a full tutorial on making this dough, visit my post for No-Knead Cheesy Bread. You can also read about it on No-Knead Dinner Rolls, too!
How to Tell When the Dough has Enough Flour
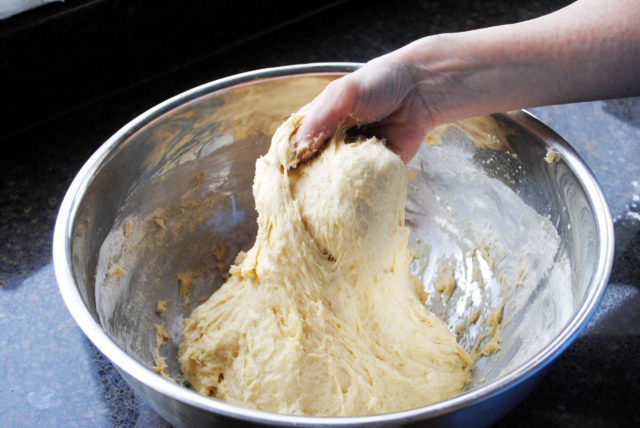
This is ready. You can see that the dough is elastic, but it is not smooth. It sticks to the bowl and is quite soft, but it is sturdy enough to hold itself together. It takes a bit of effort to free my hand from the dough at this point, because of the stickiness.
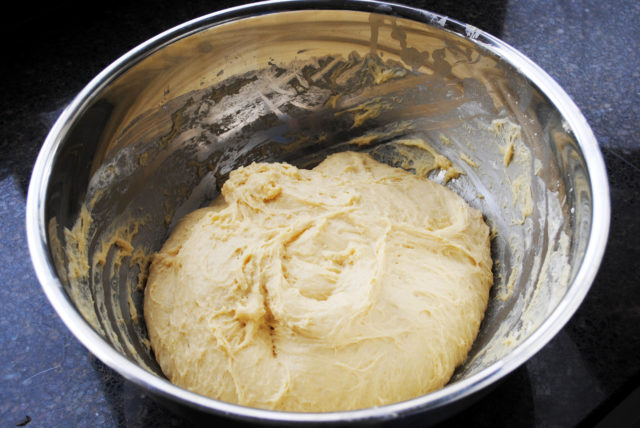
The dough is strong enough to loosely hold its shape, but it is not strong enough to stay in a ball.
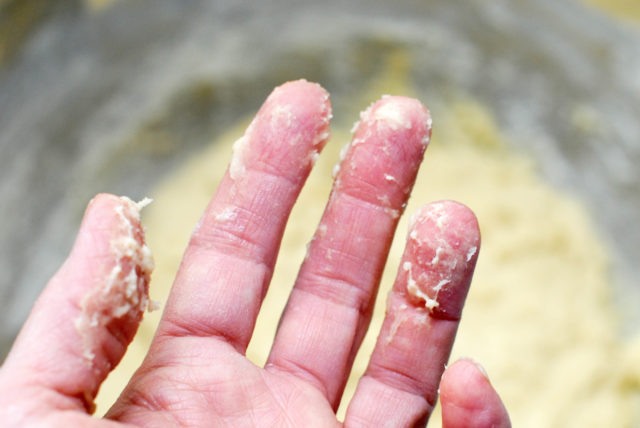
The finished dough is still sticky enough to cling somewhat to my fingers, but it does not cover or coat my fingers. However, if I were to put my whole hand in the dough and try to knead it, there would be a LOT of dough sticking to my hand.
Making the Cinnamon Rolls
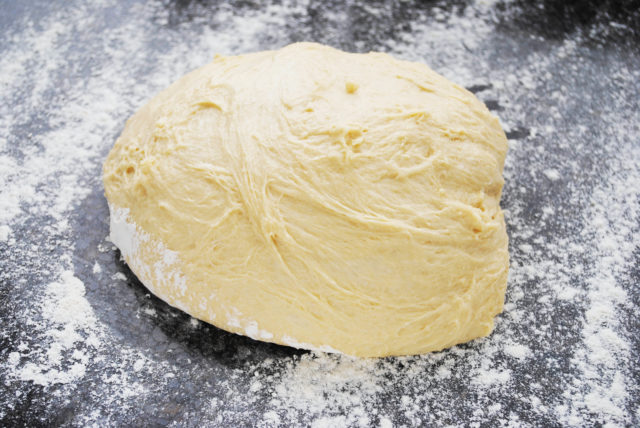
Put half of the dough on a lightly floured countertop.
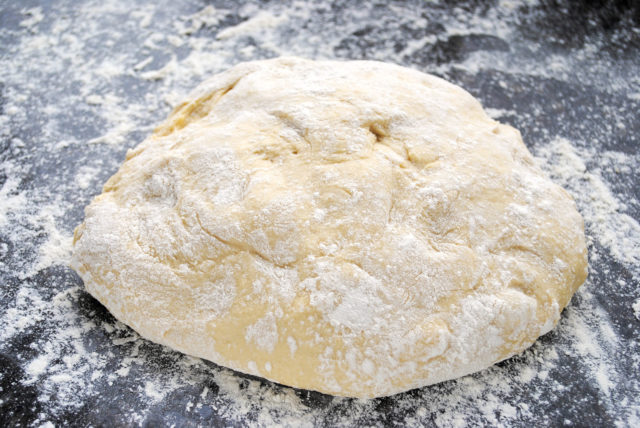
Turn it over once so that it will pick up flour on both sides. Alternatively, you can sprinkle the top with flour instead of turning it over.
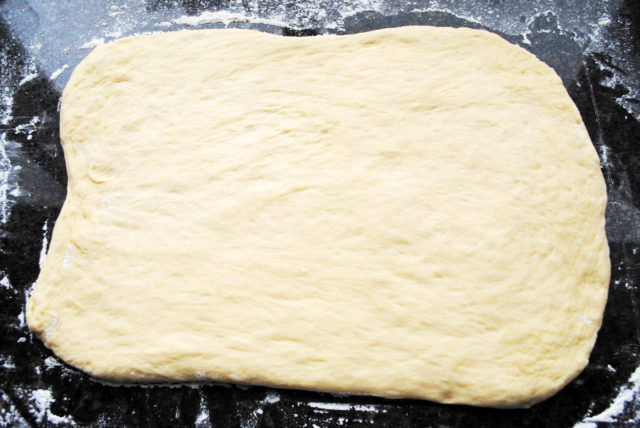
Roll out in a rectangle measuring about 16- x 12-inches. If the dough is resistant to being rolled out, let it rest on the counter for 5 or 10 minutes. You may need to sprinkle a light dusting on the dough surface if it is sticking to the rolling pin.
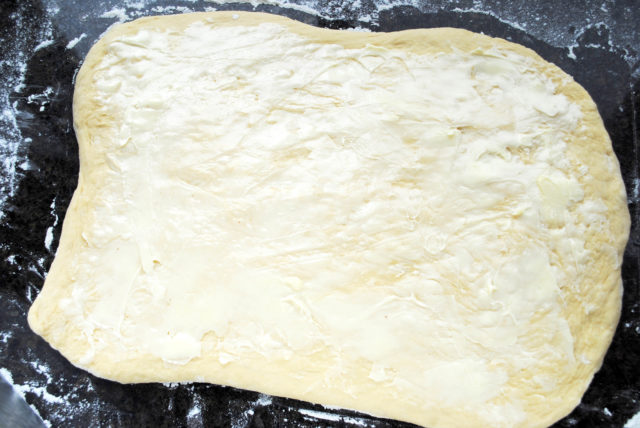
Spread 1/2 cup of very soft butter all over the top of the dough. Don’t take the butter all the way to the edges. Leave a border of unbuttered dough around the perimeter. In this photo, I wasn’t as careful as I ought to have been, so you can see that I got a little close to the edge in some places. I have been known to live dangerously.
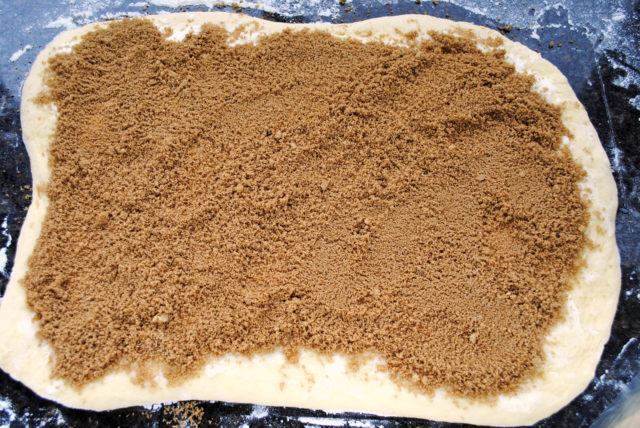
Sprinkle the cinnamon and brown sugar mixture over the butter. You may not need to add all of the mixture. It’s your choice.
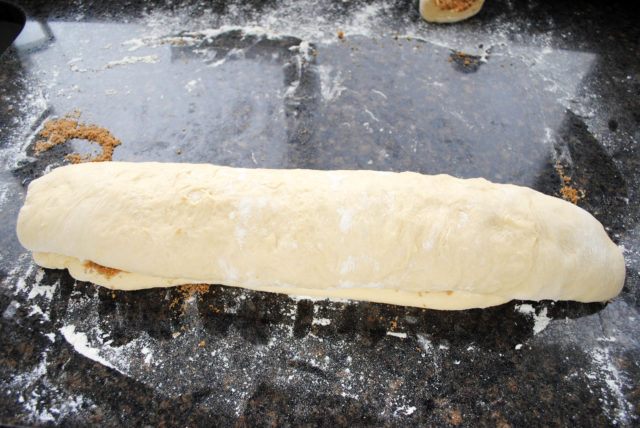
Starting with one of the long edges, roll the dough into a log shape. Roll the dough snuggly, but not too tight. Rolling the dough tightly will cause the centers of the cinnamon rolls to pop up while rising or during baking. It is best to seal the dough at the long edge.
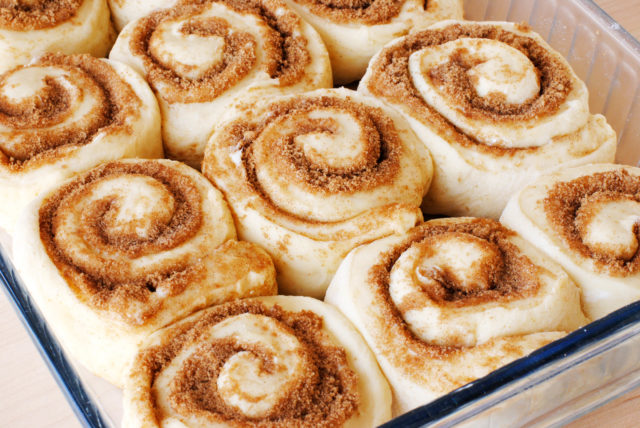
Cut the log into twelve equal pieces. Place the cinnamon rolls with the swirl side facing up, 3 across and 4 down, in a prepared 9- x 13-inch baking dish. I like to use a glass baking dish for this. The rolls just seem to turn out better.
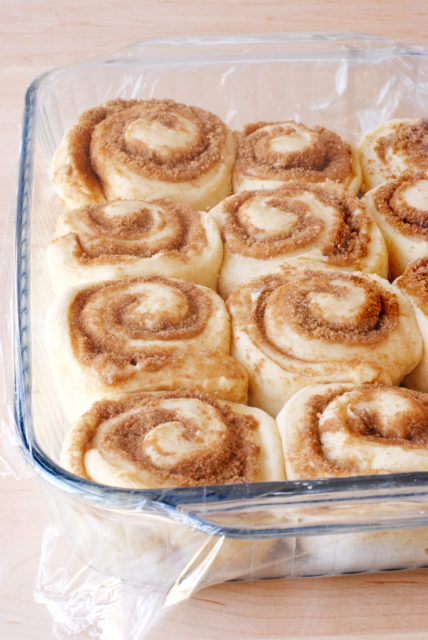
Cover the baking dish with plastic wrap. Put the rolls in a warm place to rise, 45 minutes to 1 hour. When they have risen almost to the top of the baking dish they are ready for the oven.
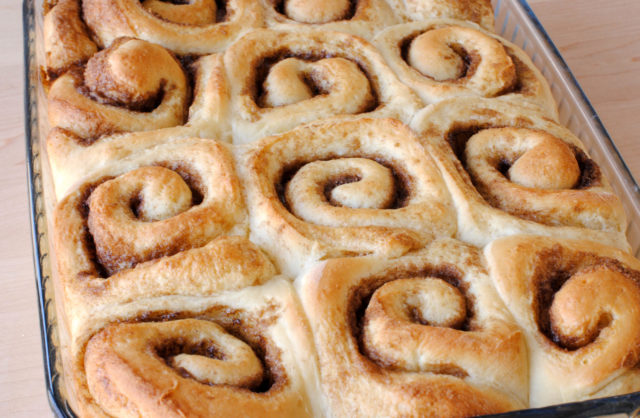
Here they are, hot from the oven. Aren’t they beautiful already?
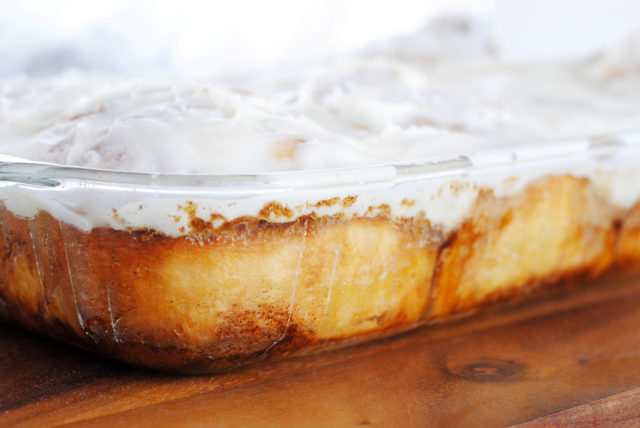
Just look at how gorgeous they are as seen through the clear glass.
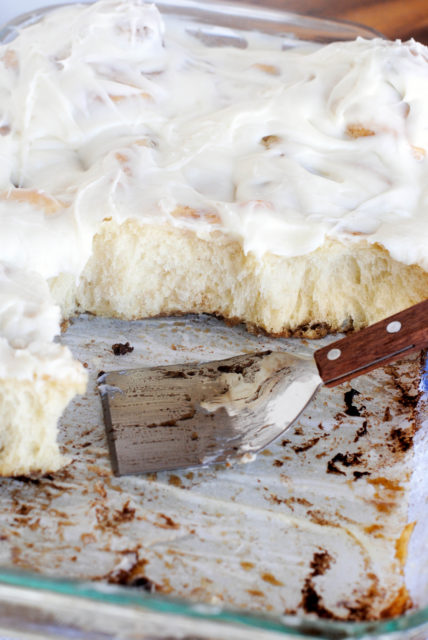
Go on. Get at it, folks!
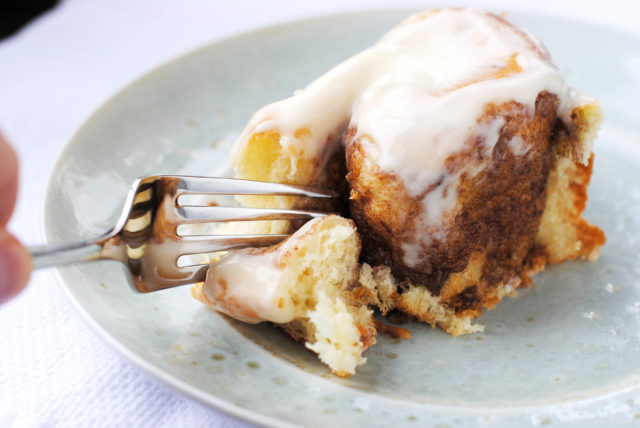
Good job!
You may also like:

Mmmmmm! There’s nothing like homemade cinnamon rolls….nothing. Heavenly delight on a plate and those in the photos are swoon worthy. We’re in the middle of a big snowstorm so one of those with coffee would be a real treat. I love to make bake during snowstorms-the aroma of what’s cooking in the oven takes my mind of the foot and a half of snow that’s in the process of falling……
This recipe and your No Knead Cheesy Bread are a good excuse to dust off my Danish Dough Whisk. I haven’t mixed dough by hand for a while and love using that when I do.
I love that you have enough dough to make 2 pans of rolls-one to keep and one to share. The filling and frosting amounts above are for 1/2 the batch of dough?
Thanks Terri-love your step-by-step photos too.
Carol, boo on snowstorms. We had a hefty snow storm last week at the same time the Northeast was getting pummeled. This week, though, it has been shirt-sleeve weather. The crocuses are in bloom! We have had a mild winter, AGAIN, this year. It is actually devastating when we don’t get much snow because it means that there is not enough snowpack in the mountains for our water needs for the year.
Thanks for catching the frosting issue. I can’t believe that I did not catch that error. I’ve fixed it now, though. Sometimes I just get things in my head and go marching right along as though everyone can read my mind. I should probably send my recipes to you ahead of time so that you can proof read them before I post them. BUT, that would mean that I would actually have to plan ahead instead of flying by the seat of my pants making changes at the last moment. In reality, I was planning on posting this recipe much earlier in the day, but at the last minute I decided that I didn’t like the pics and so I went into the kitchen and made another batch of cinnamon rolls and took more photos. It added many hours to the posting process. Is a recipe (or blog post) ever truly finished? No.
Thanks bunches, Terri-I’m really looking forward to making these. You can’t go wrong with cinnamon rolls, that’s for sure!
Yummo! Did you cut your rolls with dental floss? Great trick. I’m kinda bummed that I’m on a low-carb diet right now cause these look amazing! I totally get what you mean by the dough not being light enough. I find most cinnamon roll doughs bake up to be very hockey puck-ish so I started using an oatmeal dinner roll recipe as the base for my cinnamon rolls years ago and I never looked back. It turned dry, hard, dense rolls into moist, soft, pillowy ones. Oh hey, you know what else coconut oil does magnificent things to? Popcorn. Straight up kernels popped in coconut oil and sprinkled with very fine salt – best popcorn you’ve ever eaten in your entire life. Everyone wants to know what I do to make it so good.
Patricia, YES to popcorn cooked in coconut oil. It is like the biggest magic trick ever for making popcorn. The first time I tried it, I just kept eating the popcorn plain with nothing on it at all. My husband finally asked me if I was going to put anything on the popcorn and I told him no. I liked it just the way it was. Later on, though, I did add a touch of salt, fine salt just like you said. I agree that fine salt is key for using on popcorn popped in coconut oil.
Good to know about the oatmeal dinner roll recipe and how it translates well into cinnamon rolls. Do you have the oatmeal dinner roll recipe on your blog? I just checked and couldn’t find it. Of course I want you to share that recipe. Even though you are on a low carb diet right now, you could maybe make the rolls, share the recipe and then give the rolls away – it would be an act of service on many fronts (giggle).
Ya know, I never posted that recipe, but I did take photos of the process years and years ago. I think I’ll make a batch of the oatmeal dinner rolls for Easter – they’re the bomb. As for making and sharing cinnamon rolls, I’m afraid I don’t have the self-control. Seriously, I’d be in cinnamon roll heaven. Oh, and the finest salt I’ve found is “popcorn salt” which used to be really easy to find, but not so much anymore. Morton’s makes it (if you can find it) and a friend found some at an Amish grocery store so she brought me some – now I have a lifetime supply ;).
Going on the short list to make. Along with the coconut oil. Will try it out
Thanks to Patricia for the tip on the popcorn.
Which type (not brand – but that would be great too) of coconut oil do you ladies use???
My hips aren’t gonna be happy Terry….. LOL….
I purchase my coconut oil at costco. I think the current one I have is Kirkland brand, but Harrington Farms (?) was excellent as well.
I get mine from Costco as well! Nutiva organic extra virgin coconut oil.
Correction – Carrington Farms
Thanks ladies, EV coconut oil it is. I’ill look for those brands xoxoxoxoxox