My mother in-law used to make the most amazing dinner rolls. She called them No-Knead Dinner Rolls and I loved them! Every Saturday night she would mix up a batch of dough and then would make rolls on Sunday morning for dinner after Church. Despite all of the times I ate Sunday dinner at her house before I was married, I never saw her actually mix up the dough. My mom got into the bread making scene when I was a teenager and I knew that it was quite an undertaking for her. I think that I assumed the dinner rolls that my mother in-law made required the same amount of labor as did my mother’s homemade bread.
I was so wrong!
After I got married, I asked for the roll recipe. I still have the index card on which I copied her recipe. Clearly at the top of the card it says “No-Knead Dinner Rolls”. Despite the fact that I actually wrote down the recipe, including the directions, I just did not “get” the no-knead part.
From my perspective, all yeast breads were kneaded…and kneaded…and kneaded…and kneaded…to infinity (and beyond!). Sorry. I couldn’t resist adding “and beyond”.
Stir It Up
I kept questioning Mavis about stirring the dough without kneading it. She would say, “Ohhh stir it up, little darlin’. Stir it up. Come on and stir it up, little darlin’. Stir it up.”
She didn’t really say it like that. I just wanted to write those words. You know, get some Bob Marley reggae going on with the roll making.
But I digress. Mavis really did say to just stir up the dough. I was thick as brick, so finally one day she let me watch her mix up the dough. It was amazing! She dumped all of her ingredients into a big stainless steel bowl and mixed everything together with a big wooden spoon. Then she covered the bowl with plastic wrap and popped it into the refrigerator to rise overnight. The next morning, she would shape the rolls so that she could have them baked off in time for Sunday dinner. I totally believed her because her rolls were always coming out of the oven minutes before the meal was served. I was well on my way to being a roll making super woman.
Say Whaaaaat?
Here’s where the story takes a turn, however. I made my first batch of dough on a Saturday night so that John and I could have rolls for Sunday dinner, just like Mavis had taught me. I stirred things up, covered the bowl and put it into the refrigerator to rise overnight.
The next morning, I excitedly opened the refrigerator door to see how things were going. They were definitely going…out of the bowl. The dough had risen right on out of the bowl and onto the refrigerator shelf. Confused, and wondering what in the heck I had done wrong, I took the bowl out of the fridge, scooped what I could gather back into the bowl, punched down the remaining dough and returned the bowl to the fridge. After I got home from Church I checked on the dough again. There it was, trying to crawl back out of the bowl.
Crazy dough. I went ahead and made my rolls and set the pan on the counter so the rolls could spend the next few hours rising…just like Mavis had told me to do. SHOCKER ALERT! In less than an hour the rolls had risen so high I had to bake them off well before dinner. “Weird,” I thought. “I wonder what I did wrong.”
Mavis was convinced that I had somehow messed something up. Her dough always took hours to rise. Always. That’s the way dough behaved.
Well, my dough NEVER took hours to rise. It was a zip-a-dee-do-dah, zip-a-dee-ay kind of dough. I accepted my fate in life and adjusted the timing on the dough and all was well.
Fast Forward a Bunch of Years
My sister in-law, Julie, and I were talking one day about her mom’s rolls. I made the statement that I could never do the overnight thing with my dough. Julie said that she had the same problem. We both wondered out loud what magic Mavis had with the dough that would allow her such a slow rise time.
“Oh…hahaha,” said Mavis, who was within ear shot of us. “My yeast was old. I had had it since we came back from Sweden.”
Julie and I looked at each other bug-eyed. “Mom!” Julie yelled. “That yeast was like 10 years old! Terri and I have been thinking that we were doing something wrong all these years. You were working with almost completely dead yeast!”
Mavis just chuckled at us. “Well, I really liked the way it worked overnight. I finally used it all up and now I have to use new yeast. I don’t like that I can’t put the dough overnight in the fridge anymore.”
And that, in a nutshell, is my mother in-law. She’s about to celebrate her 90th birthday in May! WOW! Stir it up, little darlin’ Mavis.
Inspiration
This recipe is really quite a miracle of a recipe. For a gazillion years I have only ever made rolls and bread sticks out of it. BUT, this week that all changed. I made Cheese Bread and Cinnamon Rolls. I’ll give you the Cinnamon Roll version on Monday. So sorry…you’ll have to wait.
I got the idea for Cheese Bread from Gemma’s Bigger Bolder Baking blog. I love Gemma’s blog. She’s Irish, a trained chef, and a wonderful blogger. Gemma has various “Crazy” recipes. In short, she takes basic recipes for yeast dough, cupcakes, cookies, frosting, and muffins and gives a lot of different recipes that you can make from them. Gemma is very encouraging and supportive in her videos and completely invites her readers and viewers into the world of baking. I love her style.
When I watched her video on Cheesy Bread, I suddenly realized that I could do that with Mavis’ No-Knead Dinner Roll recipe. The two recipes are quite different from each other, so I was really curious to see if my recipe would work out. The thing about food blogging, however, is the amount of waste that can occur if a recipe does a Thelma and Louise right off of dead horse point. It is important to really put some thought into a recipe, especially with baking, before your grubby little paws reach for the first ingredient.
So, I thought about how the six, potentially seven, ingredients in Mavis’ recipe interacted. I thought about the bread and cinnamon rolls I wanted to make and what I’d like the final outcome to be. I thought about how the finished products would taste, what they would look like, what the texture would be, how they would keep and how easy it would be for someone else to reproduce the results.
And then I made changes in the recipe. They weren’t huge changes, but I really feel that the changes I did make produced great results.
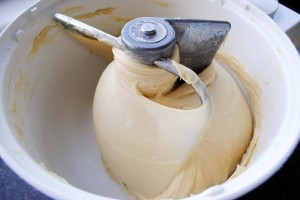 Off the top, the very first change I made was to use coconut oil in place of the vegetable oil that I would normally use. I had learned while I was making Paradise Dinner Rolls that coconut oil behaves brilliantly in yeast breads. The dough takes on a creamy, silky texture and that texture transfers beautifully to the finished product.
The second change I made to the recipe was to add 3 eggs and drop the water to 2 cups. That was an option already in place in the original recipe, but I almost never use the egg option. I stick with 3 cups of water and no eggs when I make dinner rolls from this recipe. The reason for adding the eggs this time was because I wanted a rich dough, particularly for the cinnamon rolls. As it turned out, the cinnamon rolls AND the Cheese Bread turned out great.
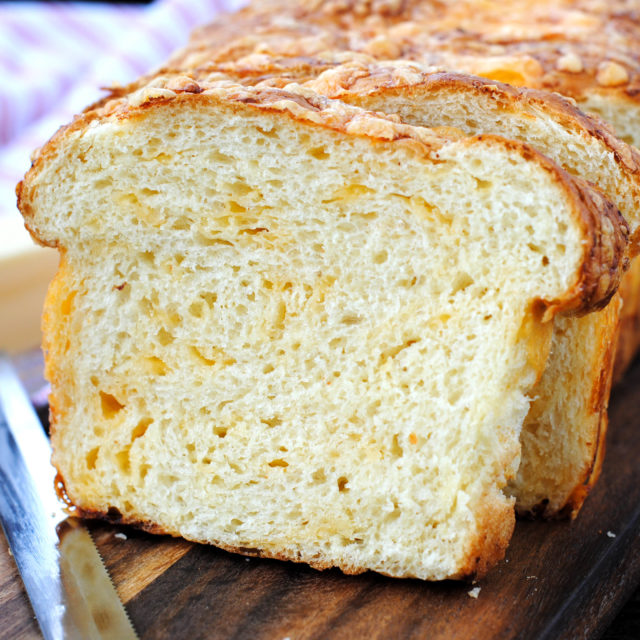
I mean, they turned out amazingly great. The bread came out cheesy and soft and full of the kind of flavor that keeps inviting you back for more. It is also a very fragrant bread. Pop a couple of pieces of it into the toaster and everyone throughout the house will know it. Your house will smell like a Cheez-Its factory. Cheeze-Its are my favorite snack. It’s been true since I was a kid. Yummy-dee-diddle-lee-yum-yum-YUM!
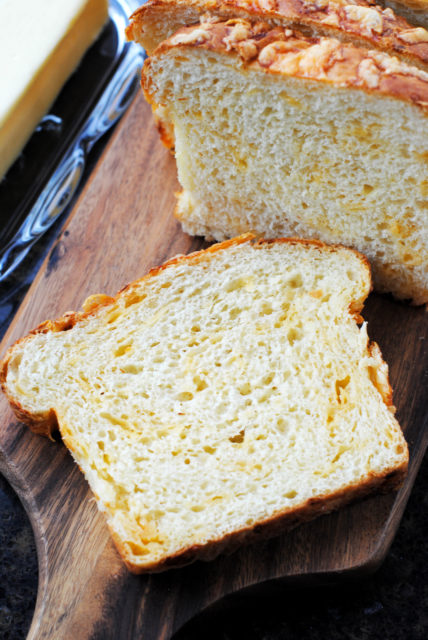
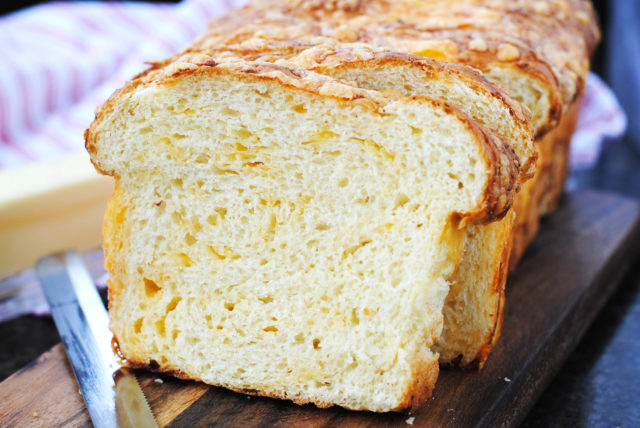
Actually, the bread looks as if it was made in a Cheeze-Its factory. Grated cheese is worked into the dough, itself, and then the bread is also topped with cheese when it is first put in the baking pan for rising. Some of the cheese works its way down between the dough and the side of the pan. Then, when the bread is baked, the cheese bakes onto the sides of the bread. It is so exciting!
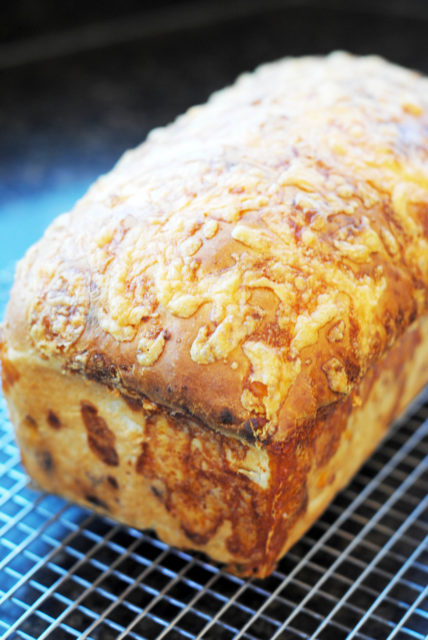
One of the many great things about this Cheese Bread is that it keeps really well for several days. The bread hangs on to its moisture and rewards you with tender bread every time you cut off a slice of it. It’s good for sandwich making and as I said earlier, it is delicious when toasted. I eat it plain – no butter. It’s perfect without the butter.
To store, simply put the bread in a plastic bag and you are good to go.
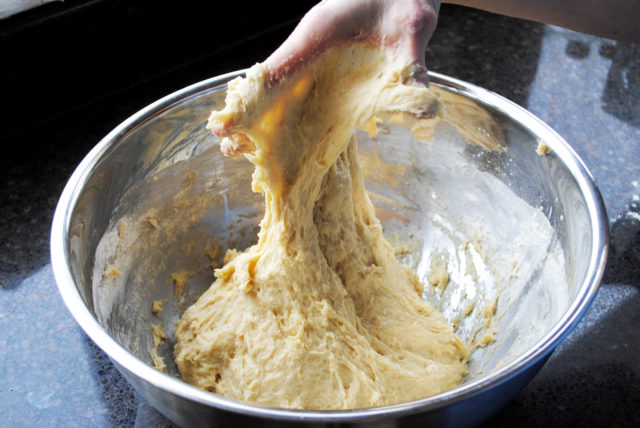
You just won’t believe how easy it is to mix up this wonderful dough. I have to confess, despite the fact this is a no-knead dough, at the end of the stirring, I sometimes need to get my hand in there and finishing mixing things together. Generally, I am not quite strong enough to finish off the mixing with a big spoon. It’s no big deal, I actually like to get my hands in the dough.
I hope that you will give this recipe a try. People have written to me telling me how much they enjoy the No-Knead Rolls, so I have no doubts about this recipe being just as popular. Enjoy!
I’ll see you tomorrow with the cinnamon roll post. Don’t worry. The post will not be nearly as long this post. I promise!
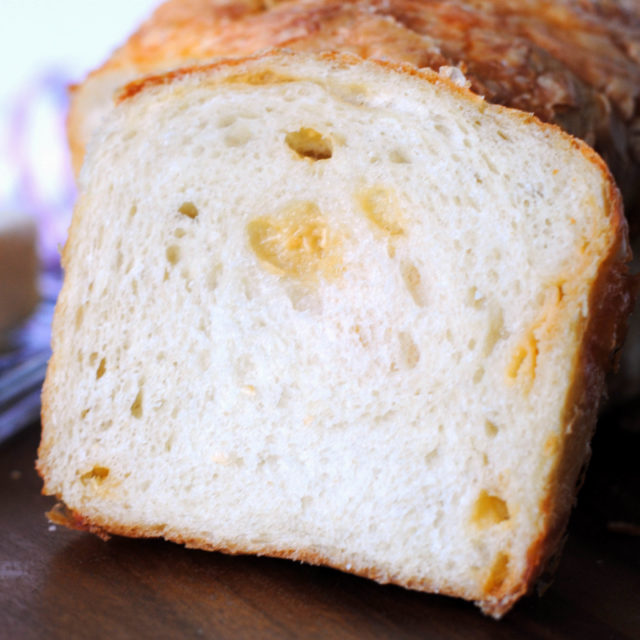
This loaf was made 24 hours after I had initially mixed the dough. As you can see, it has a different texture then the bread in the other pictures. Those loaves were made the same day that I made the dough.
No-Knead Cheesy Bread
Ingredients
- 2 cups warm water, about 105-110 degrees F
- 2 tablespoons active, dry yeast
- 3 whole eggs
- 1/2 cup white, granulated sugar
- 1 teaspoon salt
- 1/2 cup melted coconut oil
- 6-7 cups white, all-purpose flour
- 5 ounces (weight) sharp cheddar cheese, grated
- Olive oil
Instructions
- To an extra-large mixing bowl, add the warm water, yeast and a pinch of sugar. Whisk to dissolve the yeast. Set aside for 2-5 minutes to allow the yeast to activate. It will become bubbly and foamy when it has activated.
- Add the eggs to the yeast mixture. Whisk to break up the eggs.
- Add the sugar, salt, coconut oil and three cups of flour. With a sturdy mixing spoon, stir to combine well. The mixture does not have to be completely smooth.
- Add an additional 3 cups of flour. Stir until combined. The dough will probably be very sticky.
- Continue to add a little flour, maybe 1/4 cup, at a time to the mixture, stirring after each addition. The dough will become heavier and more difficult to stir. Stop adding flour when the dough loses its shiny "wet" appearance. The dough will be slack, rough looking and very gooey, but stronger than it was with only 6 cups of flour. It may be difficult to stir and you may have to use your hands to incorporate the flour.
- Cover bowl with plastic wrap and set aside in a warm place to rise until double in bulk, about 1 hour, depending on the warmth of your kitchen. Alternately, the covered bowl can be placed in an oven with only the oven light turned on. (NO HEAT!). The light bulb warms the air in the oven.
- Punch dough down and let it rest in the bowl for 5-10 minutes. Break off slightly less than half of the dough (about 1.5 lbs.). Place on a lightly floured countertop. Gather the dough into a ball. Again, the dough will be slack, but will loosely hold the ball shape.
- Turn the dough over so that the bottom of the dough will pick up some of the flour. With your hands, flatten the dough and push it into a rough rectangular shape, about 7- x 5-inches. This does NOT have to be exact.
- Sprinkle about 3 ounces of the grated cheese over the dough. With your finger tips, press the cheese into the dough. Fold the dough several times and massage the dough and cheese together to distribute the cheese.
- Grease a n 8 1/2- x 4 1/2-inch loaf pan with olive oil. Form dough into a loaf shape and place it in the pan. Sprinkle the remaining cheese over the dough. Cover pan loosely with plastic wrap and set aside in a warm place to rise, until dough has risen about 1-inch above the pan, about 45 minutes.
- Heat oven to 375-degree F. Line a baking sheet or other pan with foil. This will catch any melted cheese that may spill over the sides of the loaf pan. Place the pan of bread on the foil-lined pan. Bake for 30 minutes or until golden brown and sounds hollow when tapped lightly.
- Place the pan of bread on a wire rack and cool until just barely warm to the touch. This is important because the hot bread will collapse under its own weight if it is turned out of the pan. Slide a knife gently around the edges of the pan to release the bread. Turn out onto the wire rack and allow to cool completely.
- Store in an airtight plastic bag.
And the Picture Tutorial
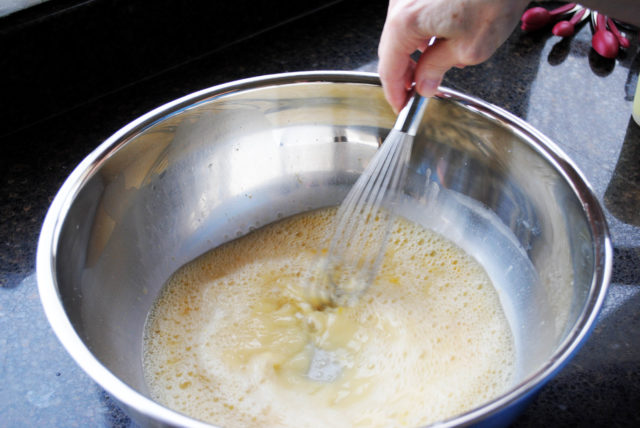
Whisk together the water, proofed yeast, eggs, sugar and salt.
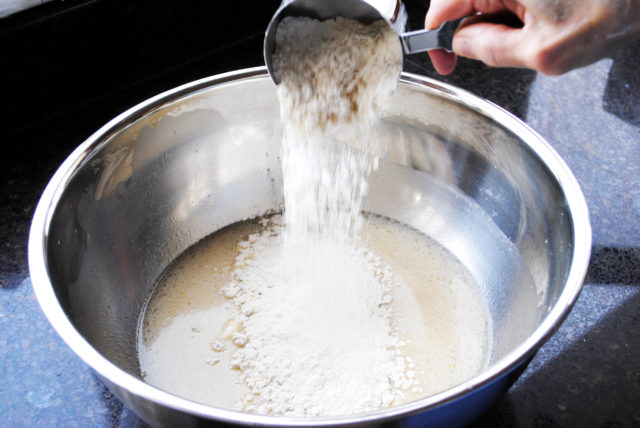
Add 3 cups of white, all-purpose flour.
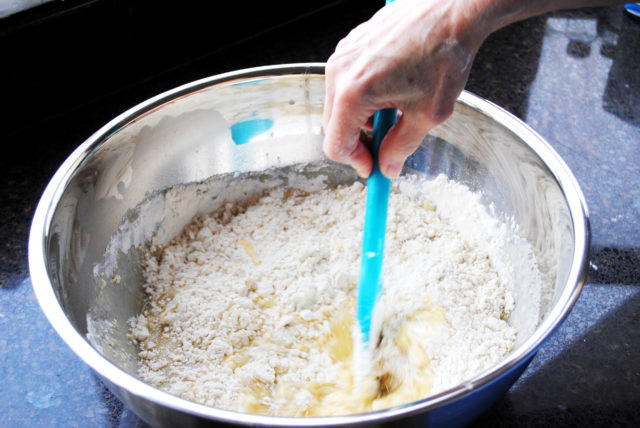
Stir it all together.
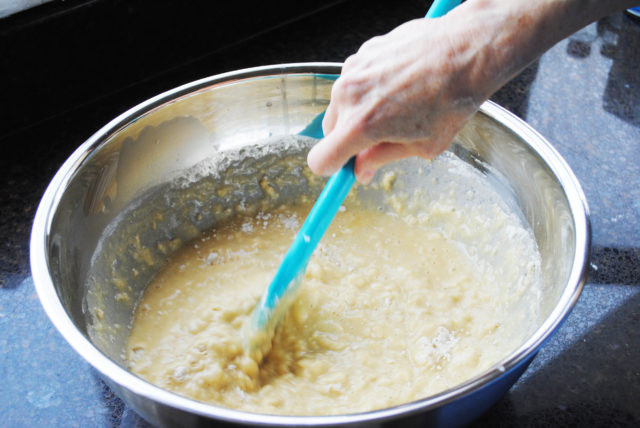
Keep stirring. It’s not quite ready.
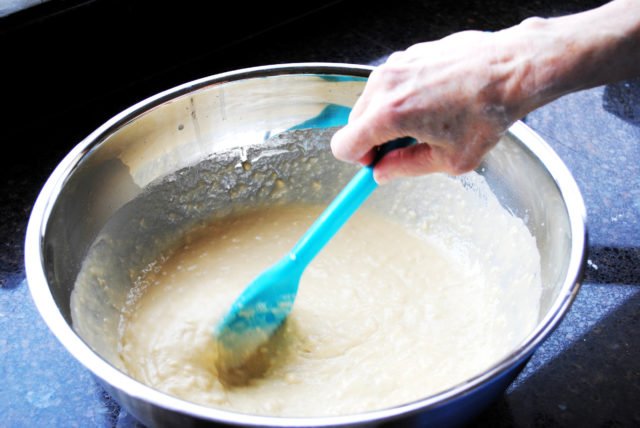
Now you can stop. This is soupy with small lumps.
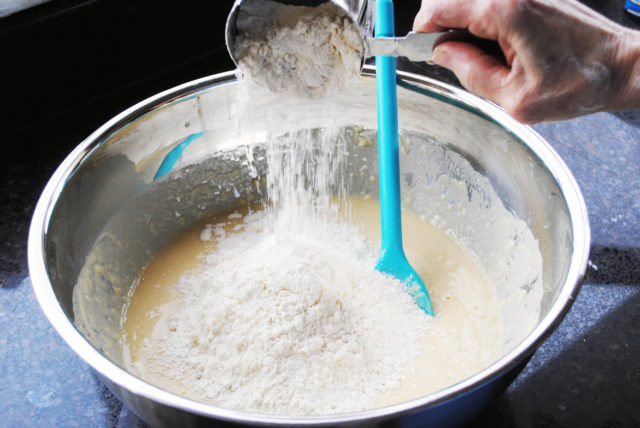
Add 3 more cups of flour.
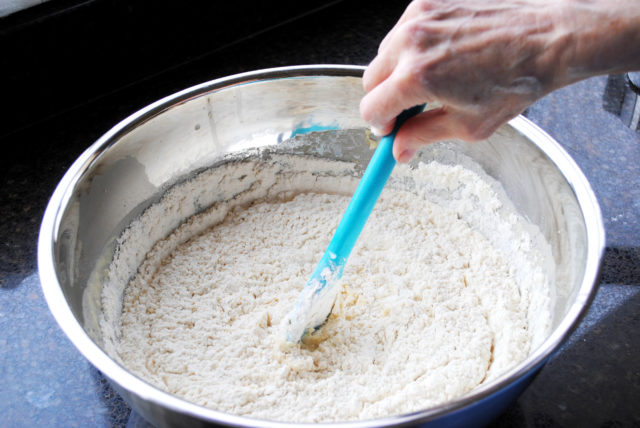
Start stirring again.
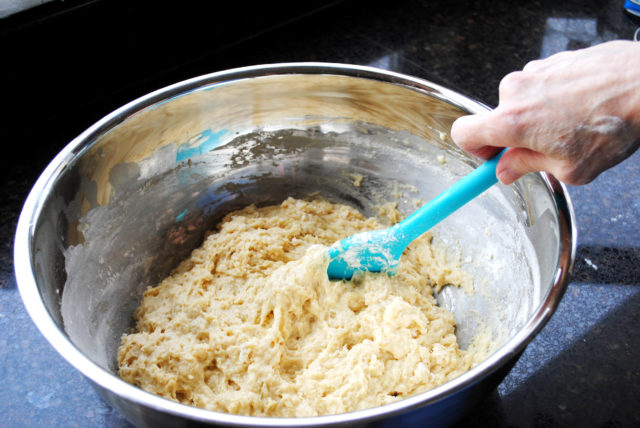
Things are getting harder to stir, but you are not quite done yet.
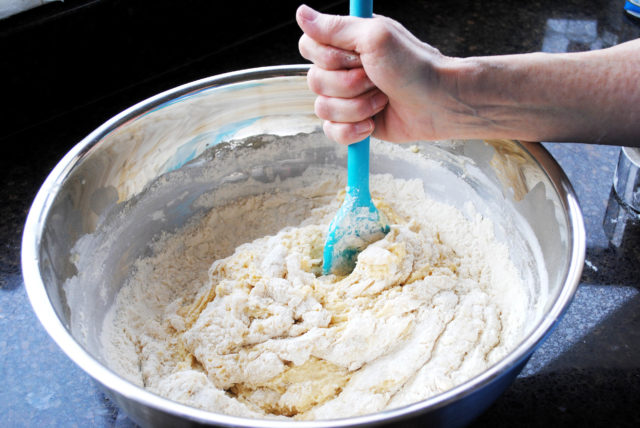
Add more flour, maybe about 1/4 cup at time and sprinkle it all over the dough. Grab hold of that mixing spoon and stark cranking. The dough will be stiffer, but probably still sticky. It’s important to not put in too much flour.
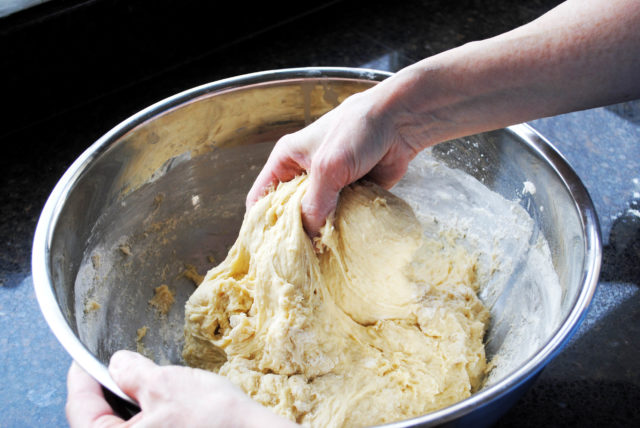
I usually (always) have to switch over to using my hands to “stir” the dough. It doesn’t take much, just enough to get the flour barely worked in. The dough is still sticky and soft. It will stick to my hands and to the bowl. I usually only put at total of a bit under 7 cups of flour into my dough. BUT, I live in a dry climate, so I need less flour than someone who lives in an area with high humidity.
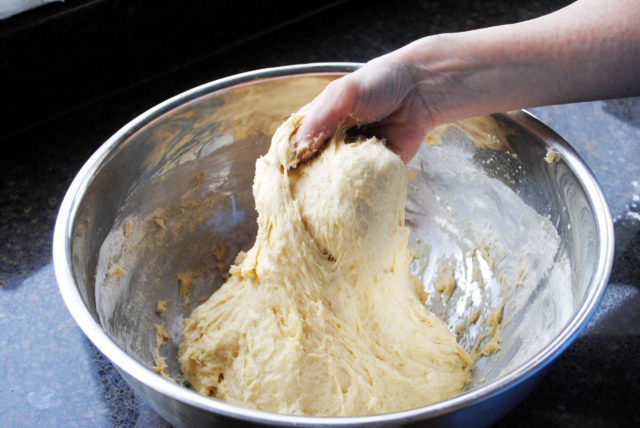
In this photo, I am showing you that the dough looks rough. It is soft and sticky enough that it will not release from the bowl when I try to pull it out of the bowl. This is perfect. The dough and I don’t want to let go of each other. I will have to hold the bowl down with my other hand while I try to extract my mixing hand from the dough. It is very gooey, which is exactly how I want it.
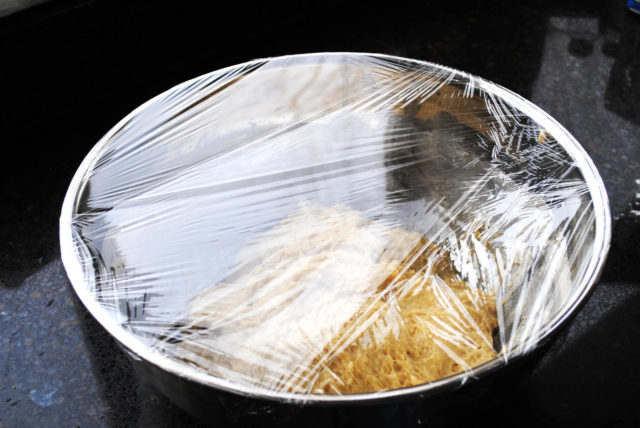
Cover the bowl with plastic wrap or a damp, well wrung out tea towel. Set the bowl in a warm place for the dough to rise. It should double its bulk in about 1 hour, depending on how warm yoru kitchen is.
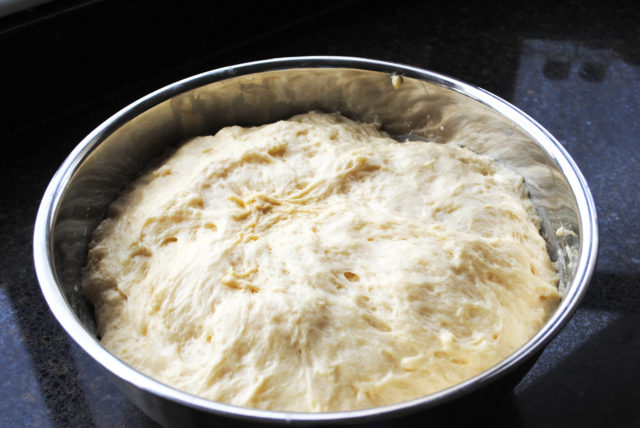
The dough has doubled. It still looks craggy. That’s just fine. It looks exactly right.
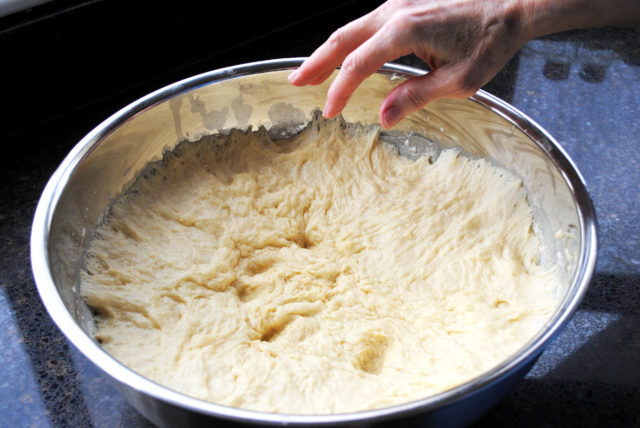
Push the dough down – or punch it, if you want to. I just push lightly with my fingers because sometimes when I punch the dough, I end up with dough all over my fist.
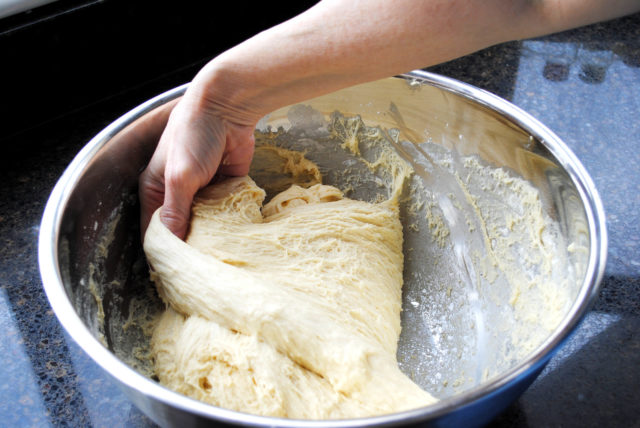
Pull the dough away from the sides of the bowl and bring it towards the center.
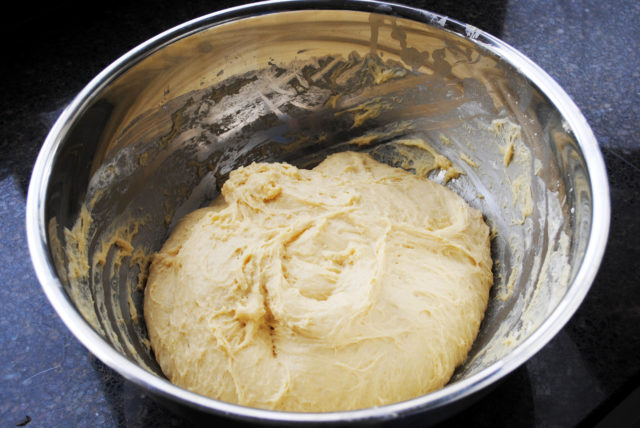
It should look similar to this when you are done.
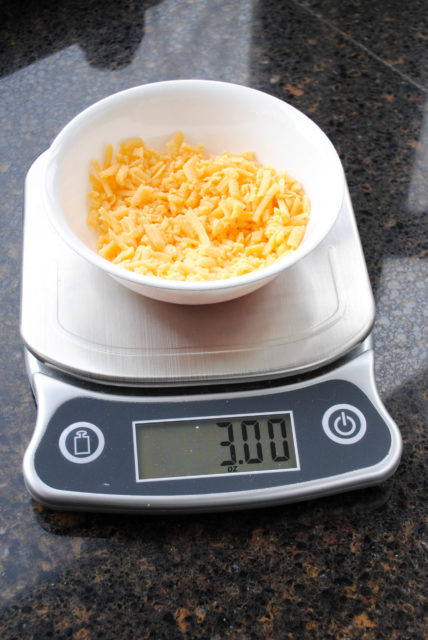
Oops. I almost forgot. Grate about 5 ounces of cheese. You are going to mix three ounces into the dough. If you don’t have a scale, three ounces of sharp cheddar cheese is about 3/4 cup.
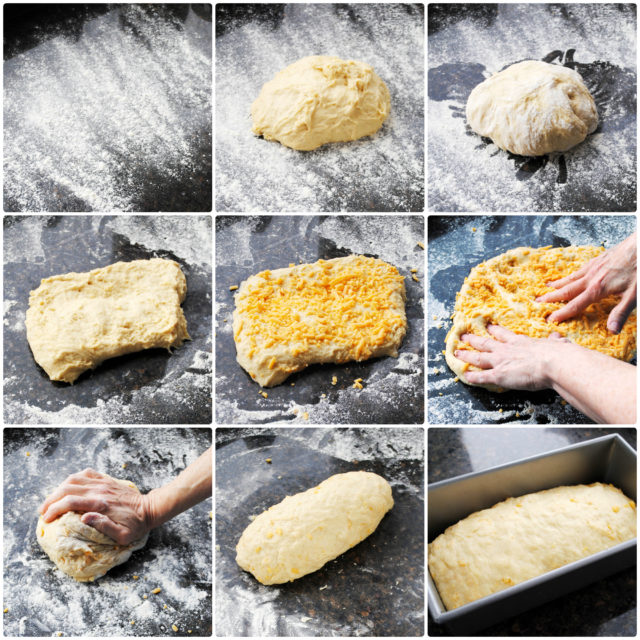
Sprinkle some flour on your countertop. Take about half of the dough, or a little less than half and put it on the floured surface. (The remainder of the dough can be used to make Cinnamon Rolls…or another loaf of bread.) Turn the dough over so that both sides have some flour on them. Push the dough into a sort of a thick rectangle. Sprinkle the cheese over the dough, then use your fingertips to push the cheese down into the dough. Smoosh the dough around to work the cheese into it. Sometimes I pick up the dough and work the cheese into it with both hands. When it feels like the cheese has been worked into the dough to your satisfaction, shape the dough into a loaf. Put the loaf into a bread pan that has been oiled with olive oil.
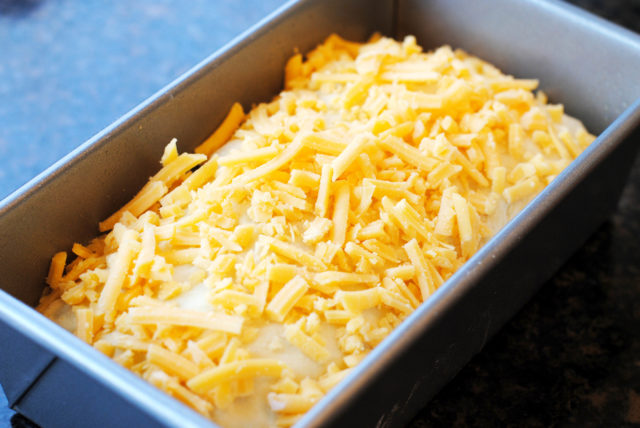
Take the remaining cheese (about 1/2 cup) and sprinkle it all over the top of the dough. This is already looking amazing!
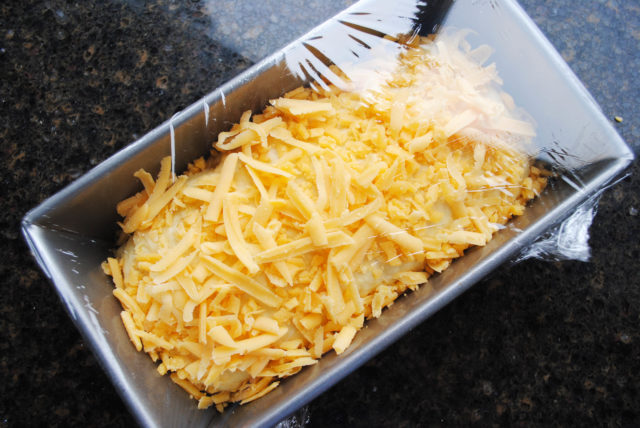
Cover the pan LOOSELY with plastic wrap and put it in a warm place for the dough to rise. The dough will be ready to bake when it is about an inch above the top of the pan.
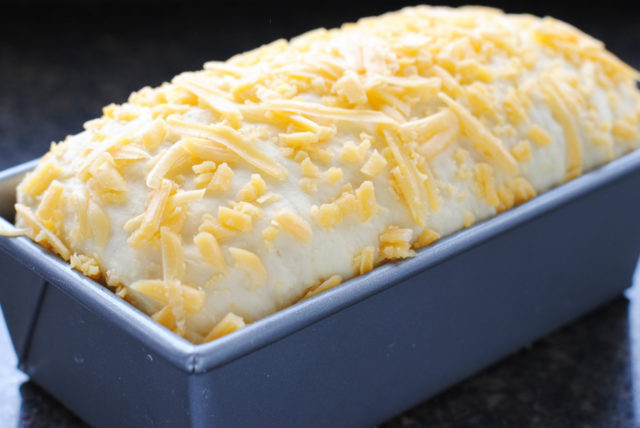
Look how beautiful!
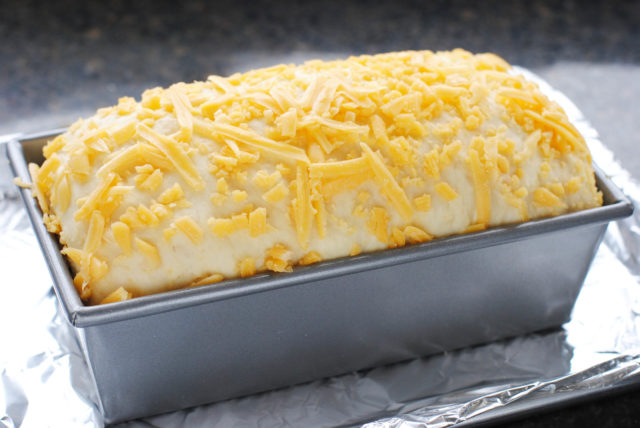
Be sure to put the bread pan on top of a separate foil-covered pan. The foil will catch the hot cheese drips. Bake the bread at 375-degrees for 30 minutes or until it is golden brown and sounds hollow when tapped or thumped lightly.
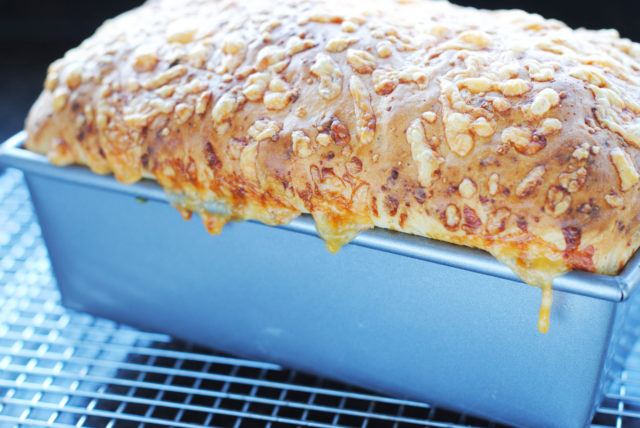
Look at those gorgeous cheese drips! Look at that amazingly beautiful loaf of bread! Place the pan on a cooking rack and leave the bread in the pan until it is just barely warm. When the bread is hot, it cannot support its weight, so leave it in the pan. When cool, slide a knife carefully along the inside edges of the pan to loosen the bread. Turn the bread out on the rack until completely cool. Store in an airtight plastic bag.





Yes please….and thank you! Making bread is my favorite thing in the whole wide world to spend time in my kitchen doing. I’ve taken a break from it as of late to let some of the holiday pounds exit the building but am ready to start up again…and your bread looks like the perfect recipe to make. How can you go wrong with all that lovely cheese? I can only imagine how good this is toasted. Yum!
“Stir it up”…hahahaha…I’ll be humming that song today now! Not a bad thing….
I loved your mother in law story….it’s gotta be a “thing”. Cases in point…..
Mother in law #1….as a new bride, my then husband asked me to make a recipe that he loved growing up that his Mom made-Lemon Bisque. He said it was like a lemon chiffon with vanilla wafer crust-SO good. I asked his mother for the recipe and she happily sent it off saying it was SO easy to make. I got the ingredients she listed..lemon jello, vanilla wafers and condensed milk. She told me to be SURE to put the can of milk in the refrigerator overnight so that the next day I could whip it into something that looked like whipped cream. I was a new bride and not familiar with a lot of cooking techniques so I followed her directions. I about burned the beater out on my handheld mixer beating that milk and nothing happened…it looked as thick and rich as when it poured out of the can. I figured well, I guess that’s how it’s supposed to be…folded the thickened jello in and spread it on the crust. My husband was THRILLED when he saw that lemon dessert in the refrigerator. He couldn’t WAIT to give it a try. Picked up the pan and almost dropped it on the floor from it being heavier than he thought it would be. He said “Uh, this isn’t what my Mom’s was like.” Enter tears of frustration….he tried it-it tasted OK but it wasn’t what he remembered. We called his Mom and asked her what could have possibly gone wrong? She said “did you chill the milk good?” Yes, I chilled the condensed milk like you wrote on the card. “Condensed milk? Oh I meant EVAPORATED milk.”
Hmmmmm evaporated milk….once I used that the end result was TOTALLY different and just what he remembered.
Then my present mother in law. When I decided to give Scotch Kisses a try to replicate what a lady at our church used to make, I knew she had made them before so called and asked her for some tips. She said just be sure to use a nice deep Dutch oven because the candy boils up high on the pan. OK-I had one of those. I followed her instructions and the end result could have killed one of my dogs had I dropped one and pegged him/her off the head. The size pan she told me to use and the size pan SHE used were not one and the same-overcooked caramel equals rock hard caramel. When I called her and rapped one on the counter asking if hers came out like that she said “Oh no, mine were never that hard. What did you do?” I told her the pan I used and she said “You used a pan that you cook spaghetti in (that’s the only way I could describe a Dutch oven)? I use a pan that I make a few hard boiled eggs in.” A SAUCEPAN? “Yes, that big deep one I have.” ARGH!!!!!!!!!!!!!! Her answer was “Oh gee, I guess we don’t use the same words to describe pans.” ‘Tis true! Every time I’ve made them from that day to present I think about that debaucle.
How about this-at least we got our answer to why ours didn’t work like theirs, right?
Can’t wait to see the cinnamon rolls….oh boy….I’m gonna be busy in the kitchen!
Carol, I can’t believe this! You are the only other person that I have met who knows about Lemon Bisque! I did a post about it back in April 2011. It was given to me by my roommates when I was in college. The two sisters came from a very large family and this was their family’s favorite dessert. Rarely, I find that someone will look at the recipe here on the blog and I wonder why they are checking it out. I can imagine that if they are not familiar with the recipe, they are shocked to learn that it is a dessert, lol.
Hi Terry …. Confession: haven’t read the WHOLE blog yet. Did scroll and saw what looks like step-by-step photos…YES!!!!!!!!!!! Please continue that way. I (and I’m sure others are too) am a better visual learner. Please keep up those photos and not just the “beauty shots”…….. xxooxoxoxo Rie
Well, Rie, I don’t know what to say about someone who doesn’t take the time to read an extremely long blog post. A blog post where clearly the author does not know when to stop talking! lol
Keep talking!!!!! I, for one enjoy a lengthy blog…. Just had too much to do that day but just jump on to take a peek…LOL
That’s a fantastic story! Jeff and I both had a good laugh. I’m so excited to see the new posts! I came by to get the granola recipe and the cheesy bread is a pleasant surprise that is going to be added to my menu for the week. My girls would love a slice of this tucked into their lunch boxes. I’m looking forward to the cinnamon roll recipe as well. Thank you!
Hi, Becca. It’s good to hear from you. It’s a vintage Grandma story, right? I love Grandma Mavis to pieces. I love that she can laugh at herself as easily as she can laugh at someone else. She truly enjoys life.