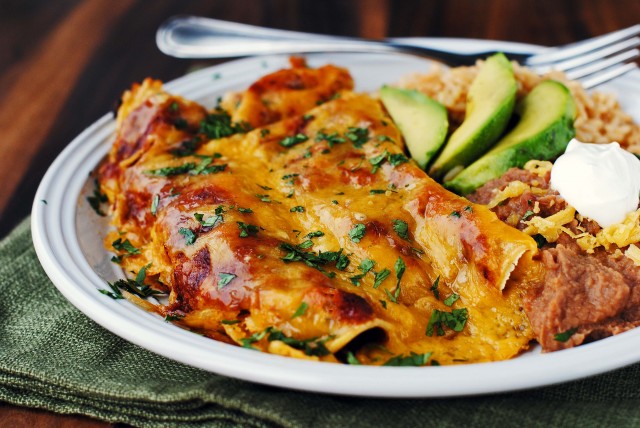
Bah! I have seriously been working on this recipe for weeks. Here’s the low down:
- The first time I made it, I thought that I was so clever using a pressure cooker. Yea, umm, I was all set to post that one on the day of the Boston Marathon. The recipe was complete with great step-by-step photos using the pressure cooker and as I was preparing to take photos of the finished product, I learned about the bombings. Could my timing have been worse? Definitely could NOT post that one.
- The second time around, I decided to use the slow cooker. It worked great, but the photos of the finished product were disappointing.
- The next day as I was assembling some more enchiladas to make better “finished product” pictures, my daughter’s baby crisis started and I made the remaining enchiladas for her family, sans the photos.
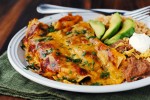
- In light of everything that has happened in my life over the past week, it seemed ridiculous that I was stressing over posting ugly enchilada pictures. Let’s be honest, when you go to a Mexican restaurant, what does the food on your plate look like?????? Messy, ooey, gooey deliciousness, right? Say “yes”. You know it’s true.
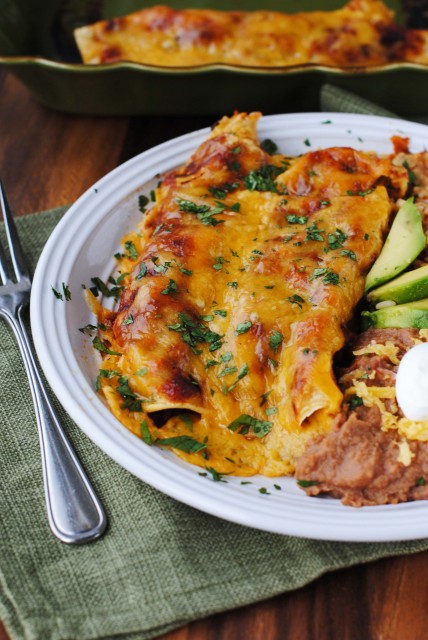
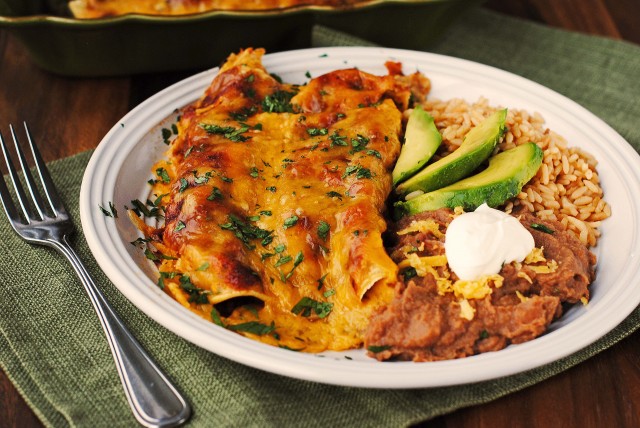
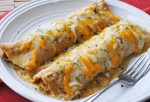
- If you want to see prettier enchilada pictures, look at the pics on Green Chili Chicken Enchiladas and Cheese Enchiladas. The one above? It’s real life, baby; the way enchiladas really look when I make them for my family — every square inch covered in glory.
Salsatory Revelation
The #1 thing that makes these enchiladas so great is the homemade sauce. I love to reverse engineer the recipes of prepared food products by reading ingredient labels on cans or bottles. However, it was only recently that I became “inspired” to look at the label on a can of enchilada sauce.
Now here’s a true confession (so embarrassing): I did not know that enchilada sauce was tomato based. I thought that it was chile based. The label on the enchilada sauce left me unconvinced.
Channeling Sherlock Holmes (can you channel a fictional character?) I searched the internet as well as some Mexican cookbooks that I have had for years. The internet lead me to recipes using both tomatoes and whole chiles + spices, as well as recipes using only tomatoes + chile powder + spices. My Mexican cookbooks gave me a measure of comfort in the fact that only one of them contained a recipe for enchilada sauce.
The next logical step was to come up with a good, edible, blog worthy recipe. In the end, I imagined myself eating a really great enchilada sauce and thought about how I could achieve that flavor. The resulting answer surprised me and when I put my theory to the test, the forthcoming sauce was excellent. It even passed the son in-law test.
About the Beef for the Enchiladas
Since the pressure cooker option is temporarily out of favor, I turned to my old friend, the slow cooker in order to get beautifully tender beef and an exceptionally flavorful broth.
The beef chuck roast is seasoned with salt, then browned in a small amount of oil. It is then placed in the slow cooker, sprinkled with chipotle chile powder and cumin, and surrounded by onions and smashed garlic. Beef stock is added and the slow cooker is turned on high. The beef cooks until it is falling-apart-tender.
After cooking, the liquids, onions, and garlic are blended until smooth and become the supporting base of a delicious enchilada sauce. You are going to LOVE this recipe!
Update: If you are short on time or need an enchilada sauce for other enchiladas such as Cheese Enchiladas, use this fast and easy Red Enchilada Sauce recipe.
Shredded Beef Enchiladas with Homemade Red Enchilada Sauce
Ingredients
For the Beef
- 2 pounds chuck roast
- salt, to taste
- 2 tablespoons oil of choice
- 1 1/2 cups beef stock
- 2 medium onions large dice
- 4 large cloves fresh garlic rough chopped
- 1/2 teaspoon chipotle chile powder
- 1/2 teaspoon ground cumin
For the Red Enchilada Sauce:
- 2-3 cups reserved beef stock from cooking the roast
- reserved cooked onions and garlic pieces from cooking the roast
- 1 can (28 ounce) tomato puree
- 1 tablespoon chili powder
- 2 teaspoons cumin
- 1 teaspoon granulated onion
- 1 teaspoon chipotle chile powder
- 1 teaspoon Mexican oregano
- 1/2 teaspoon garlic powder
- 1/2 teaspoon salt, or to taste
- 1/4 teaspoon black pepper
For assembling the enchiladas
- 16 6- inch corn or flour tortillas
- 1 can (15 ounces) black beans rinsed and drained
- 1 can (7 ounces) whole green chiles drained and diced
- 12 ounces (weight) grated sharp cheese
Suggested Toppings
- Avocados cut as desired
- Sour cream
- Chopped cilantro
- Guacamole
- Fresh tomatoes, diced
Instructions
For the Beef
- Salt the roast on both sides, amount per personal preference. Set aside.
- In a large pan, heat the oil over medium high heat. Brown the roast well on all sides. Lower heat if necessary to keep the roast from burning or the oil from smoking.
- Place the well browned roast in the slow cooker. Add the beef stock.
- Sprinkle the roast with chipotle chile powder and cumin. Scatter the onions and garlic over the roast and around the inside of the slow cooker.
- Cover slow cooker with lid. Cook on high for 6 hours or on low for up to 10 hours until the beef is fork tender. Remove roast from slow cooker and set aside to cool. RESERVE the cooking liquid, onions, and garlic.
For the Enchilada Sauce
- With an immersion blender or in a standard blender, blend the reserved beef stock, cooked onions and garlic until smooth.
- Add the pureed tomatoes and the remaining enchilada sauce ingredients. Stir or blend well to combine.
- Transfer to a 3 quart pot and heat over medium heat until bubbly. Continue to cook the sauce at a low boil, adjusting heat as necessary, for 20 minutes, stirring as needed, until sauce has reduced slightly. It should be somewhat thickened, but still loose.
For Assembling the Enchiladas
- While the sauce is cooking, shred the beef. The beef will be very tender and falling apart, so shredding is very easy. Simply pull the beef apart with two forks.
- In a large bowl, stir together the shredded beef, black beans, and green chiles. Stir in approximately 1/2 cup of the prepared enchilada sauce.
- Warm the tortillas. A microwave works well for this. I warm the tortillas in the open package for 1 minute on 50% power. Then, divide the stack in half, flip the stack so that the outer-most tortillas are face to face and in the middle of the stack, and heat for another 1 minute on 50% power.
- Working with one tortilla at a time, spread a thin coating of the enchilada sauce, about 2 tablespoonsful, on one side of the tortilla.
- Place some of the shredded beef mixture down the center of each tortilla (about a scant 1/4 cup). Sprinkle some cheese over the beef mixture. Spoon 1-1 1/2 tablespoons of enchilada sauce on top of the cheese.
- Wrap one edge of the tortilla snugly around the beef mixture and roll up. Place seem side down in a 9- x 13-inch baking dish.
- Pour the remaining enchilada sauce over the prepared enchiladas. If you feel that there is too much sauce, then reserve some of it separately for those who prefer more sauce or place the remainder in an air-tight container and freeze for further use.
- Sprinkle the remaining grated cheese over the top of the enchiladas.
- Bake at 350-degrees F until cheese is melted and the enchiladas are heated through, about 20-30 minutes.
Notes
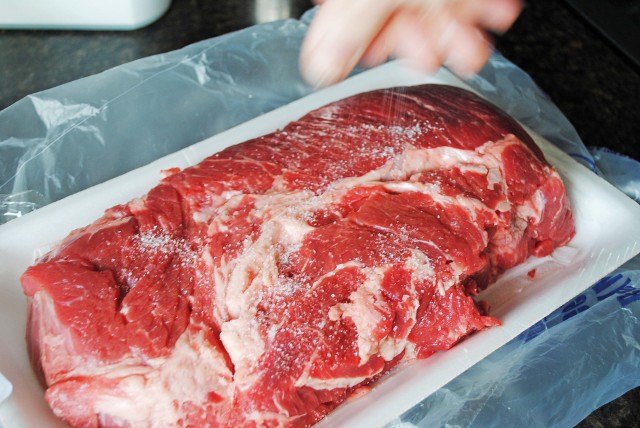 Chuck roasts work well for enchiladas. They have a great “fall apart” quality for shredding when cooked in a slow cooker. Sprinkle both sides of the roast with salt before browning./
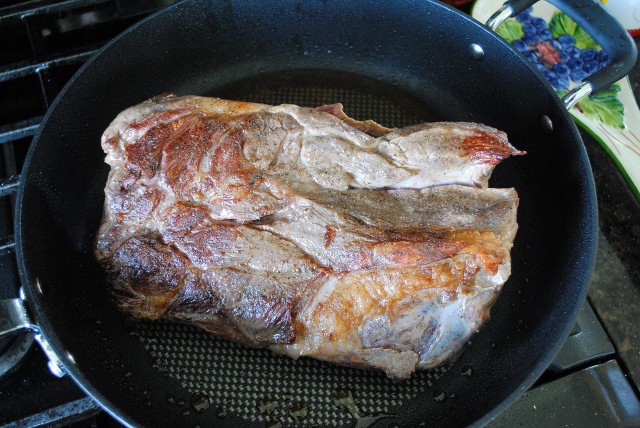 Heat a frying pan until it is nice and hot. Add two tablespoons cooking oil, then add the roast. Brown on one side, turn it over and brown the other side./
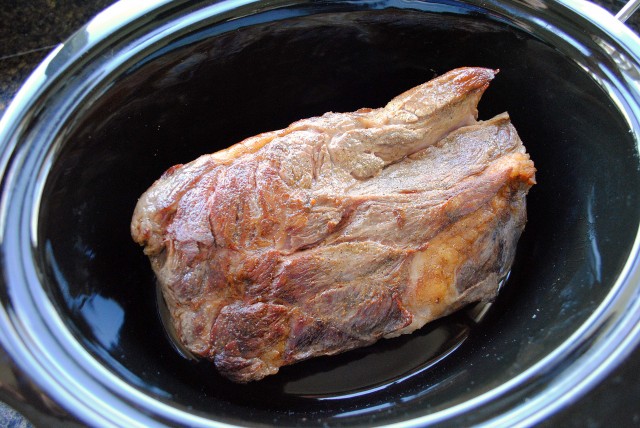 Put the browned roast in the bottom of a slow cooker./
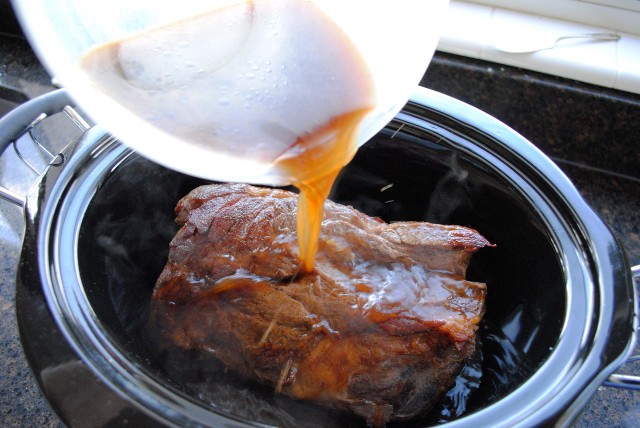 Pour 1 1/2 cups of beef stock over the roast./
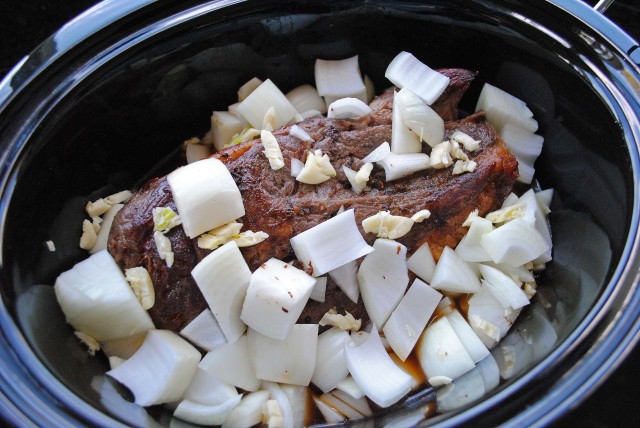 Toss the onions (large dice) and smashed garlic on top of the roast and around the sides of the slow cooker.
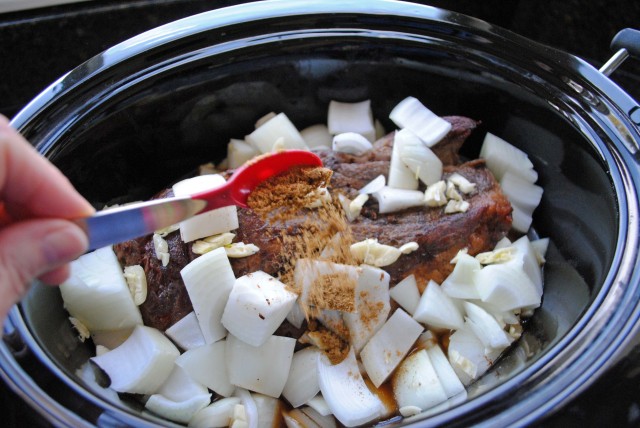 Add the cumin. Cumin and chipotle chile are added twice in this recipe: once on the meat and then again to the sauce. Yum!
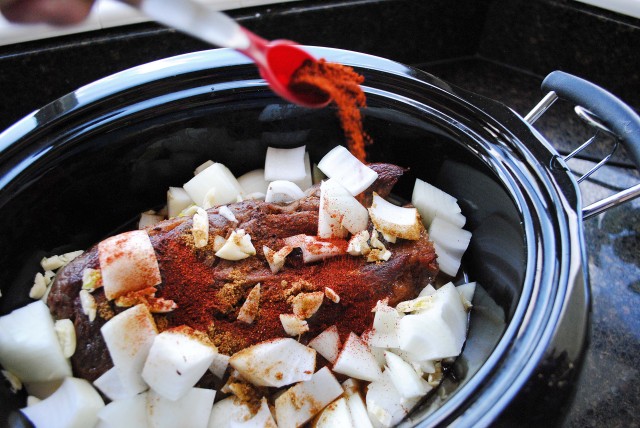 Sprinkle the chipotle chile powder over the whole shootin’ match. This brings a bit of heat and a wonderful smoky flavor to the roast.
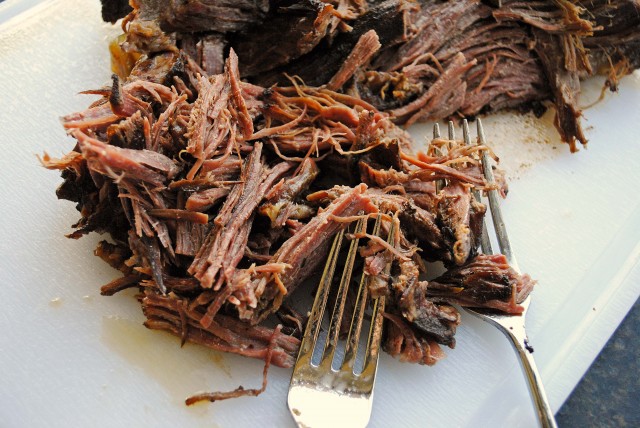 When the roast has finished cooking and is falling apart (woohoo!), take it out of the slow cooker and set aside on a cutting board to cool. When cool enough to handle, shred or pull the meat apart with two forks. The meat is so tender that it requires very little effort in the shredding process. Longer/larger pieces can be rough chopped into smaller pieces with a sharp knife.
 The “gravy” that is left behind in the slow cooker is outstanding all by itself. It makes a fantastic base for the enchilada sauce. Make sure that you have at least 2 cups of cooking juices. Having up to three cups is okay. Just eyeball it. The cooked onions and garlic are not part of the liquid measurement, but they are used as part of the sauce. With an immersion blender or in a standard blender, blend the cooking liquid, onions, and garlic until smooth. Oh boy, so delicious!
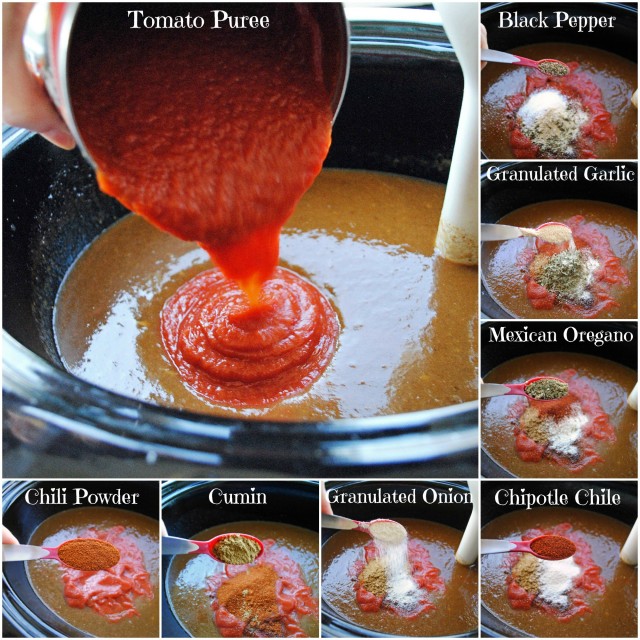 This is the part where true beauty happens. Add the tomato puree, chili powder, ground cumin, granulated onion, powdered chipotle chile, Mexican oregano, granulated garlic, and ground black pepper to the gravy. Mix well. I used the immersion blender for this.
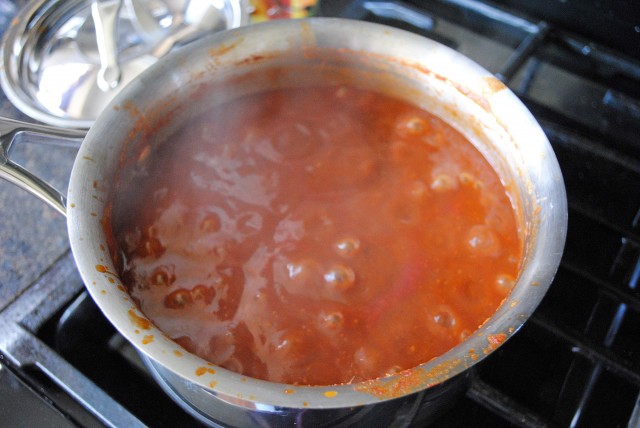 Put the sauce into an appropriate sized sauce pot. Bring to a low boil over medium heat. Cook, stirring as needed, for about 20 minutes until the sauce has thickened slightly and the flavors are well infused. Adjust seasonings as needed. This sauce is brilliant! (I’m using the word ‘brilliant’ as the British use it; not ‘brilliant’ as in superlative intellect.)
 While the sauce is saucing, finish preparing the filling ingredients for the enchiladas. I prefer to dice canned whole green chiles rather than using canned diced chiles. It has been my experience that the cans of diced chiles have too many pepper “skins” in them. I feel that I get more bang for my buck if I dice the chiles myself. If you’d like to roast your own fresh green chiles to add to the sauce, then all I have to say is YOU ROCK!
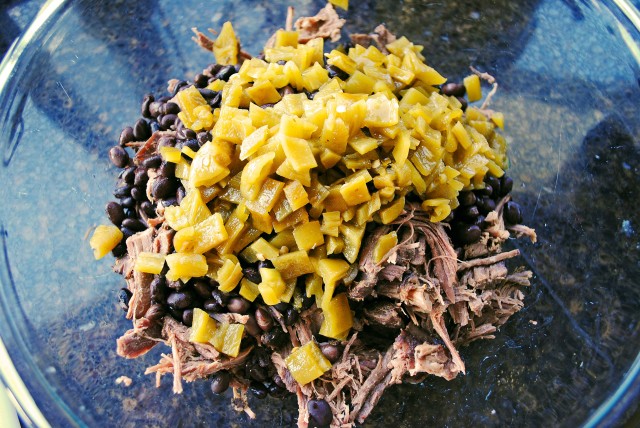 Put the shredded beef, black beans, and diced green chile peppers in a large mixing bowl.
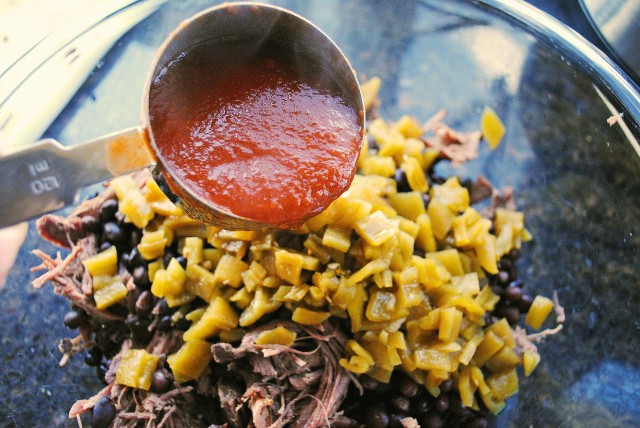 Pour about 1/2 cup of enchilada sauce over the filling ingredients. Stir everything together.
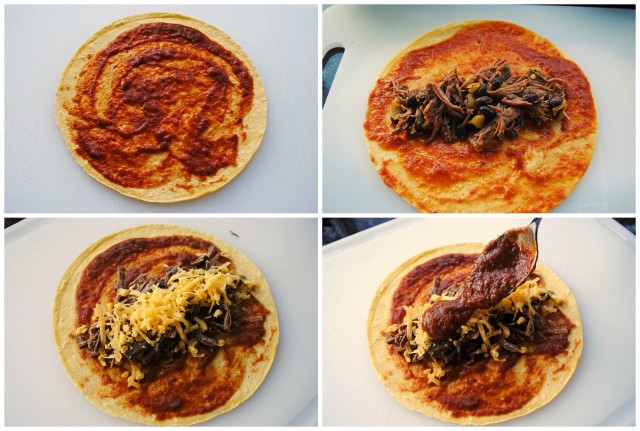 Things are starting to get really exciting now. Working with one warmed tortilla at a time, spread 1 1/2-2 tablespoons of the enchilada sauce on one side of the tortilla. Put approximately 1/4 cup beef mixture down the center of the tortilla. Sprinkle with some grated cheese. Spoon some of the enchilada sauce on top of the cheese. Oooooooo, this is looking and smelling great!
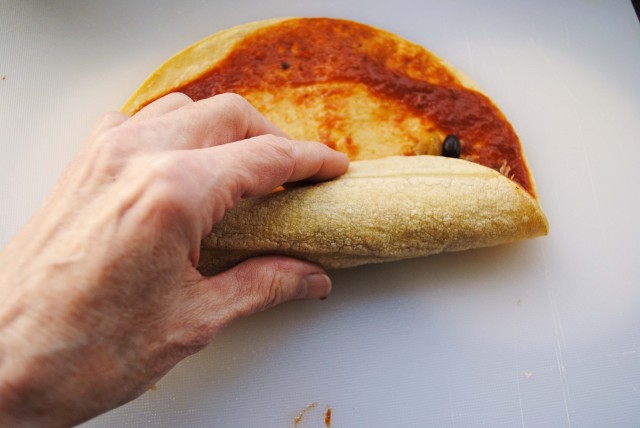 Roll up the tortilla nice and snug around the filling. Place in a lightly greased baking dish. Depending on how many enchiladas you are making, two dishes may be required.
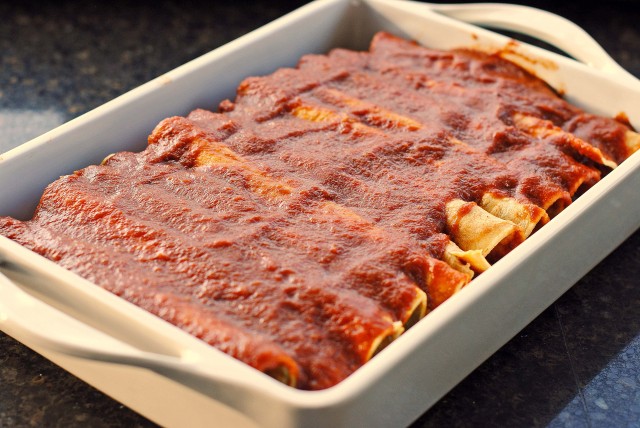 Top the enchiladas with the remaining sauce. How much sauce to use is a judgement call on your part. I personally prefer a goodly amount of sauce.
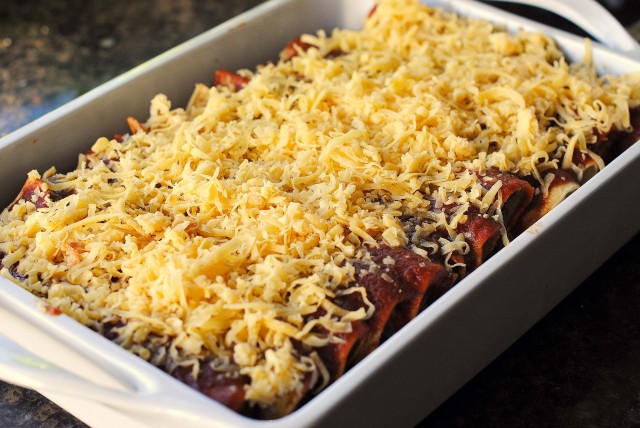 Sprinkle the top of the enchiladas with a generous amount of cheese. Generosity is saintly, but that is just my opinion. Take it for what it is worth. Bake the enchiladas in a preheated 350-degree F oven for 20-30 minutes until the cheese is melted and the filling is hot.
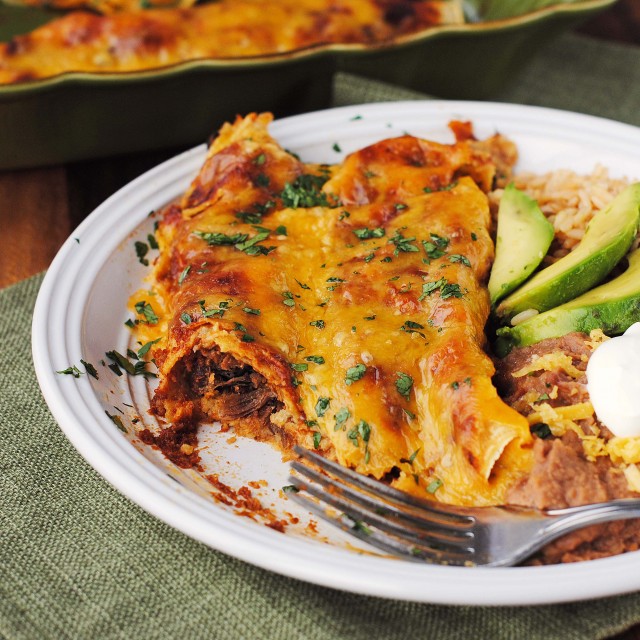 Sprinkle top with chopped cilantro, if desired. Serve with refried beans, Mexi-rice, sour cream, sliced avocados or guacamole, diced tomatoes, shredded lettuce or other items of personal preference.
You may also like:


Terri, these are the most beautiful enchiladas I’ve ever seen!! So, there!
Can’t wait to try them, the sauce sounds amazing. I’m making your black bean recipe this weekend (should have looked up the title before I started writing this), but we just love them. You’re in our thoughts and prayers. Happy weekend!
Karla–hahahahaha about “so, there!”. I’m glad that you like the black bean recipe; even I don’t remember the name of the recipe. Thank you for the thoughts and prayers. Slowly, but surely, things are getting better. My daughter got readmitted to the hospital for a couple of days because she developed HELLP syndrome (worse than preeclampsia) after delivery. Very rare for that to happen. The baby is thriving and each day he gets a little better. Tricia’s milk came in, so she saves it and it is fed to the baby through his feeding tube. It’s kind of funny to watch him; as soon as the warm milk hits his little belly, his eyes kind of roll around and he goes to sleep. Oops…long response. I’m planning a follow up post for my week in review. My life and my heart are full to over-flowing. ~Terri
This recipe is awesome..BUT I’ve been cooking my Enchaladas for years almost the same way, my mother taught me the So Cal way of doing the tortillas…
1) Add about a half inch of vegetable oil to a cooking pan and heat to med high.
2) Get good fresh white corn tortillas and toss one in the pan flip after a min or two so it firms up a bit but you can still roll it up without it cracking. ( this keeps your Enchaladas from being soggy and turning to mush unless you like a soggy cheese mess on your plate)
3) Then roll up your Enchaladas anyway you prefer. And enjoy!
This will make this already awesome dinner a 10! Hope you all enjoy!
Aaron Strohauer
Aaron, thanks for your tips about tortillas!
Loved these enchiladas! I doubled the recipe and made enchiladas for a crowd. I added a 1/4 cup of sugar (the sauce was doubled) to take away the bitterness of the chili powder. I like saucy enchiladas and this was a great ratio of sauce to beef and tortilla. With regards to the corn tortillas, skip the microwave. Just dip them in your simmering enchilada sauce for two seconds, place it on a plate and top it with the meat mixture then roll it up. It may take some trial and error but if you do it right, the tortilla won’t crack or get soggy and crumble.
I don’t think they are ugly at all. They look like I want to dive into them. I am going to give your enchilada sauce a try. I made some homemade sauce when I made enchiladas for the blog…I refuse to use that canned stuff. bleh! Your ingredients are all that I would use…. so I know it’s good.
  Hope your precious grandson is doing well.. keeping your family in my prayers.
PS… Substitute for curry leaves.. maybe bay leaves or you can omit them all together.
Your photos look terrific…they’re making my mouth water!!!! What a fantastic recipe…the family would go nuts for these
I just made the enchiladas, refried beans and rice and they were absolutely out of this world!! I’m so glad I stumbled onto this blog. My family is raving about this meal for sure!! Thanks for sharing!!

June, you have made my day. Three cheers for you and your success!
Shredded beef enchiladas are one of my all-time favorite foods. When we go to Mexican restaurants, they are what I usually order. Over the years, I have made them at home and always with the powdered enchilada sauce. This time I was going to try to make the sauce myself. I found your recipe and thought it sounded delicious.
I cooked the roast in a crockpot the day before. When it was finished, I put the roast into a container and put the sauce into a covered sauce pot. I left them in the refrigerator overnight. The next day, when I had time to assemble things, I noticed quite of bit of solidified fat on top of the sauce. I knew the cheese was going to add tons of fat on its own, so I scooped off the fat. I was aware the entire time that I was scooping off some of the spices that were trapped in it, but I did it anyway. I then used my emersion blender on the cold sauce and hand shredded the roast. This also made it easier to remove any fat still in the roast. — Can you tell I don’t like pieces of fat? — I then cooked the sauce and assembled the enchiladas as you directed.
They turned out mouth-wateringly perfect! So tasty I couldn’t wait to eat the leftovers the next morning for breakfast.
I just wanted to thank you so much for sharing such a delicious red sauce recipe, and taking all of the guess work out of it for me.
P.S. Your photos are gorgeous! Better than any food-stylist perfect pics any day.
One question. As many times as I’ve made enchiladas, I have always used corn tortillas because I like the flavor much more than the flour. I have never successfully made enchiladas without the tortillas cracking when I try to roll them. Any suggestions on how to fix this? Maybe I’m not getting them hot enough before I fill them? I’m at a loss.
Thanks again, you rock!
Monica, I’m so glad that you liked these enchiladas and that the recipe worked well for you! I completely understand about the fat issue–I like skimming off the fat in various recipes as well. When working with warm liquids which contain a fair amount of fat, I use a fat separator so that I can get rid of the fat fast and keep on working. This bypasses having to take the time to chill the product in order to remove the solidified fat.
As for tortillas cracking, there is a separate method for handling corn tortillas vs flour tortillas.
The biggest concern with corn tortillas is moisture and warmth. They need to be warmed sufficiently (very warm to the touch) and kept moist. They can be kept inside the plastic package or kept in a moist cotton towel or moist paper towels.
For corn tortillas, although I did use the microwave to warm the corn tortillas in this post, I often warm mine for a few seconds in hot oil (yes, oil–after I have just made the statement about my aversion to solid fats ;). Put a little oil in a skillet and heat over medium high heat. To test to see if the oil is hot enough, simply dip the edge of a corn tortilla in the oil. If the oil immediately makes vigorous small bubbles around the tortilla edge, then the oil is a good temperature. If there are no bubbles or only few tiny bubbles, then the oil is too cool and will result in oil laden tortillas that fall apart. Overly vigorous, dancing bubbles means that the oil is likely too hot and will result in crispy (or burned) edges which will break when rolled. To warm the tortillas in the correct oil temperature: place one corn tortilla at a time in the oil, let it cook for a few seconds (3-5?) on one side, then lift with a pancake turner and gently flip the tortilla to allow it to cook for a few seconds on the opposite side. (Some people use tongs for turning the tortillas, but I almost always end up tearing the tortilla with the tongs.) Lift tortilla from the oil, tilt turner slightly to allow excess oil to drip back into the pan and place tortilla on several layers of paper towels. I always blot the top of the tortilla with additional paper towels to remove excess oil. Repeat process with all tortillas, keeping the cooked, waiting tortillas covered to preserve warmth and moisture. When ready to assemble enchiladas, work with one tortilla at a time and keep the remaining tortillas covered. Dip tortilla into enchilada sauce, fill, roll and place in pan.
Today I found an alternate method for warming corn tortillas. Dip a tortilla into a bowl of water and then warm in a frying pan. I have not tried this technique yet, but find it interesting. Here is the link to the Serious Eats page. It includes a “how-to” video.
This is an additional link from Good Housekeeping with several suggestions for heating corn tortillas, none of which involve using oil.
Although you stated that you don’t like flour tortillas, I am including these slightly more in-depth instructions (than those from the recipe) in case another reader has questions about warming flour tortillas. For flour tortillas, they must be warmed until they are soft and pliable. I usually do this in the microwave, leaving the tortillas in the plastic package in which I bought them. I put the opened package in the microwave and warm the tortillas for 1 minute at 50% power. I then take the stack of tortillas out of the package, divide the stack in half and flip the two halves over so that the outermost tortillas are now in the middle of the stack and the middlemost tortillas are on the outside of the stack. I put them back in the package and return them to the microwave to cook for 1 more minute at 50% power. I keep them in the moist, warm environment of the plastic package and only work with one tortilla at a time while assembling the enchiladas. This way, the tortillas stay moist, warm and pliable.
Just made these for a party. So delicious!!!! Definitely a keeper!
That’s great, Marla! I’m so happy that the recipe worked well for you. Thanks for dropping by to leave a message. ~Terri