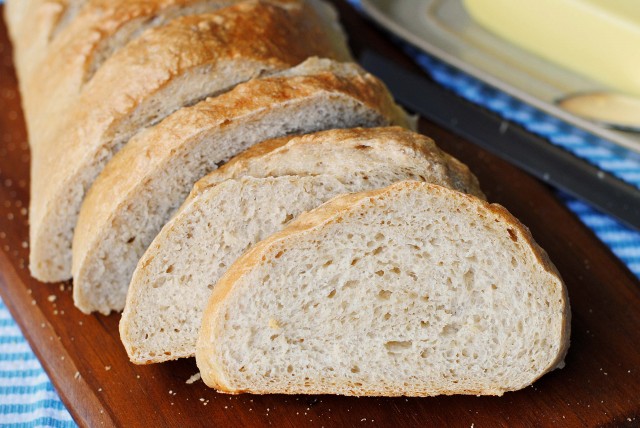
For me, there is nothing like the smell of baking bread to say “Welcome home. I love you.” I think that it even bests cookies. Last night when my husband walked into the house, he glanced at the tumbled kitchen and then at me with a smile on his face.
“I made the Split Pea Soup With Ham that you wanted….and some French bread,” I said by way of explanation for the extreme mess. “I created some recipes. I hope you like them.”
John stood smiling at the kitchen, trying to figure out which of the pots, pans, baking trays, and other kitchen paraphernalia might be hosting (or hiding) his dinner. “The soup is on the stove in the big pot and the bread is over there, ” I said pointing in a general north east direction towards a cluttered, flour dusted counter top. “Everything tastes great! Better than I’d hoped.”
“Which big pot?” John asked as he stood staring at his pot choices.
“The one with the lid on it and warm food in it,” I said. I think John’s question was a backhanded way of making a comment about the fact that I had used ALL of our pots cooking a simple meal. But hey, in my defense, creative kitchen genius gets messy. Couple it with staging the food for a photo shoot and also taking process pics, welllllll, things can get messier than usual. The way I see it, clean up can wait; it’s not going anywhere. But the sun waits for no one and if I lose the light, then I lose an opportunity for a good picture and a whole day has been wasted.
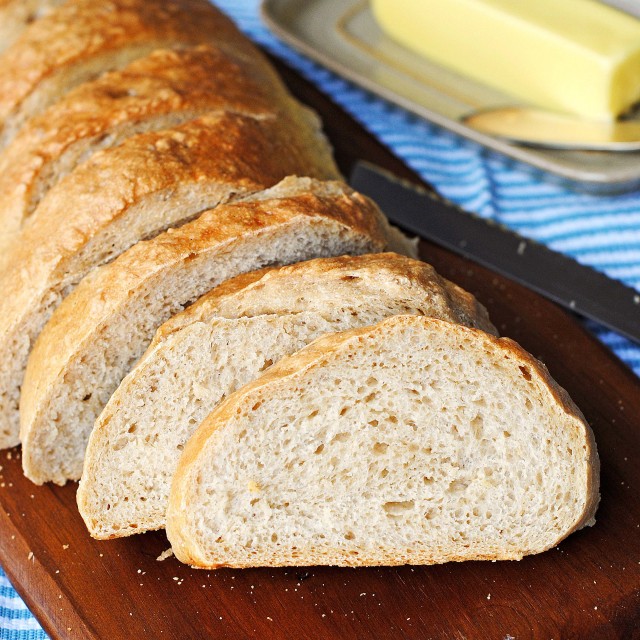
Although I mostly started out talking about soup, this post is really about the bread. Incorporating whole wheat flour into bread products around my house has always been a challenge. Typically over the years my family has been resistant to whole wheat, preferring all white flour products. Due to some health issues which exist in our home, I have been more and more determined to incorporate whole wheat into the breads which I make. I have previously posted two of my favorite recipes, 100% Whole Wheat Bread and Whole Wheat Buttermilk Pancakes (YUM!)
My family is moderately accepting of breads which are made with 1/2 whole wheat flour and 1/2 white flour. I find that using half whole wheat flour and half white flour is an acceptable compromise. Giving credit where credit is due, however, one of my daughters has made the switch to whole wheat bread…thanks Tim for helping her see the light. And, in turn, my little grandkadiddles like whole wheat bread better than white bread. Yippy skippy!
Process Notes
I use a hard white winter wheat flour, one which I grind myself at home. Hard white winter wheat gives a great tasting product, having a milder flavor and providing a lighter colored product than does hard red winter wheat. I have seen flour ground from hard white winter wheat in the stores, so I know that it is available for those who do not have the means to grind their own wheat. Of course, if you don’t have white wheat flour available in your store, red wheat flour will also work just fine.
French bread is referred to as a “lean” bread because it does not contain an added fat such as oil or butter. As a matter of fact, the ingredients consist of water, yeast, flour, and salt. I totally cheated and added some sugar because I wanted to make the whole wheat mooooore…..agreeable to certain parties.
One of the big definers of a good yeast bread is the “second day” test. Almost any bread tastes great warm from the oven, but what about the next day? As I sit here writing this post, I am chewing away on some toast made from yesterday’s bread. It is still soft and tender with a bit of crunch to the crust. Score! This is definitely a keeper.
I used a couple of different techniques to create a tender, slightly chewy crumb and a crispy outside to this bread. I consider the bread making process fun, not fussy, even feeling a bit artisanal. So cool.
- I made a “sponge” and allowed it too rise a few times before adding the remaining flour.
- The bread was brushed with an egg white wash prior to baking.
- I sprayed the inside of the oven twice with water during the baking process: once when I first put the bread into the oven and a second time after the bread had been baking about 15-20 minutes.
The recipe is really quite simple and makes two loaves of bread. Because they are meant to be “rustic”, you can get by with ugly loaves. It’s kind of like the 18 year old van that I drive…it’s not old, it’s vintage. So, aesthetically compromised bread loaves are not ugly, they are rustic. 😉
1/2 and 1/2 Whole Wheat French Bread
Ingredients
- 2 1/2 cups warm water, divided
- 2 tablespoons yeast, about 3 packets
- 2 tablespoons white granulated sugar
- 2 teaspoons salt
- 2 1/2 cups whole wheat flour (I used hard white winter wheat)
- 2 1/2-3 1/2 cups white all-purpose flour or bread flour
- 1 egg
- cooking spray
- corn meal for sprinkling on baking sheet
- spray bottle filled with water
Instructions
- Dissolve yeast in 1 cup warm water with a pinch of sugar. Allow to activate for 5-10 minutes or until foamy.
- While the yeast is activating, in the mixing bowl of a stand mixer add the remaining 1 1/2 cups water, sugar, salt, whole wheat flour and 1/2 cup white flour. Add the activated yeast and turn mixer to low to blend all of the ingredients.
- Increase the speed of the mixer to medium and mix the ingredients for about 15 minutes. Turn mixer off and allow sponge ingredients to rest for another 10 minutes.
- The sponge will begin to rise. Turn mixer back on for a few seconds, just long enough to deflate the sponge. Turn mixer off again and allow the sponge to rise for another 15 minutes.
- Add 1 cup of white flour to the sponge and mix on a low speed to allow the flour to be incorporated.
- Add another 1 cup flour a little at a time and allow the mixer to incorporate it into the other ingredients.
- In 1/2 cup increments, with the mixer running, add enough of the remaining flour to form a medium soft dough. Allow the mixer to knead the dough until smooth and elastic. If your mixer cannot handle the dough, then turn the dough out onto a floured counter top and knead until smooth and elastic. Be careful not to incorporate too much flour. You do not want the dough to be stiff.
- Gather dough into a ball. Place in an oiled or greased bowl; turn over once so that lightly oiled surface of dough is facing up. Cover with a damp cloth or plastic wrap and place in a warm place to rise until almost double in bulk. I like to put the bowl of dough in a barely warmed oven with the oven light turned on for additional warmth. To warm the oven, I turn it on its lowest setting and let it heat up for a couple of minutes, then turn it off before placing the dough inside the oven to rise.
- Punch dough down and turn out onto a lightly floured surface. Knead the dough a few times to release the large gas bubbles formed by the yeast. Divide the dough in half, form each half into a ball, cover with the damp cloth, and allow to rest for about 5 minutes.
- While dough is resting, prep the baking sheet. Spray the baking sheet with cooking spray or use a very light coating of oil. Sprinkle baking sheet with cornmeal. Set aside.
- Working with one dough ball at a time, with your hands (or a rolling pin if you need it) push the dough ball into a rectangle about 10 inches long and 8 inches wide. This does not have to be exact. The rectangle can be a bit larger or a bit smaller; exact size isn't critical to the outcome.
- Starting at one end, roll the dough up into a loaf. Pinch the seam closed. To help form nice ends on the rolled up dough, fold a few inches of each end towards the seam and pinch closed.
- Turn the loaf over with the seam side down. With both hands, gently give the loaf a more elongated and uniform shape as needed by squeezing and pulling gently. The loaf should be about 10-inches long. Repeat with remaining ball of dough.
- Place the shaped loaves onto the the prepared baking pan. Leave space on all sides of the loaves for rising. Cover with damp towel and allow to rise for about 45 minutes or until nearly double in bulk.
- Preheat oven to 375-degrees F. While the oven is heating, mix together the egg white and 2 teaspoons water. Set aside.
- With a sharp knife, preferably a bread knife, make 4 or 5 slashes 1/4- to 1/2-inch deep diagonally across each loaf. Use a light hand with the cutting so that the loaves will not collapse. Brush each loaf with the egg white/water mixture.
- Place baking pan in the oven, then using the spray bottle of water quickly, but thoroughly spray the bottom and sides of the hot oven with water. This will make steam which will help to crisp the crust. Close the oven door and bake the bread for 20 minutes.
- Open the oven door and spray the bottom and sides of the hot oven with water once again. Work quickly so that not too much heat will be lost. Bake for another 15 minutes or until the bread has a medium golden brown color and sounds hollow when tapped.
- Remove from oven and place the loaves on a cooling rack to cool. Store any leftover bread in foil.
Notes
Loaf Shaping and Baking Tutorial
For a comprehensive dough tutorial, please see the post for 100% Whole Wheat Bread.
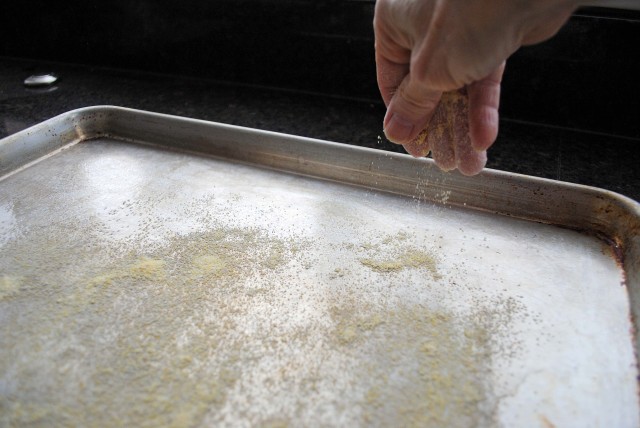 Prepare the baking pan by first spraying it with cooking spray or lightly coating it with cooking oil. Sprinkle the pan with cornmeal.
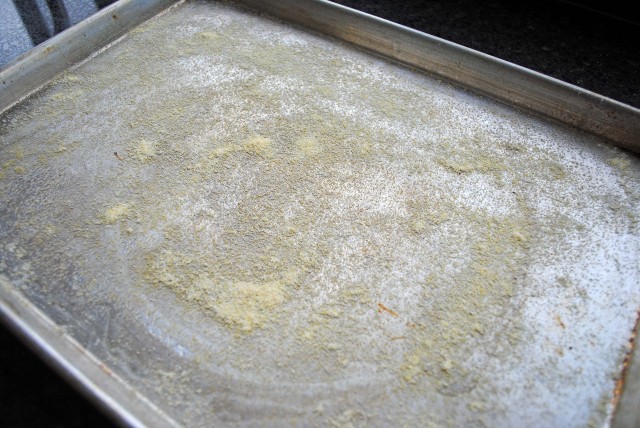 The cornmeal coating should be light. There is no need to have a heavy coating.
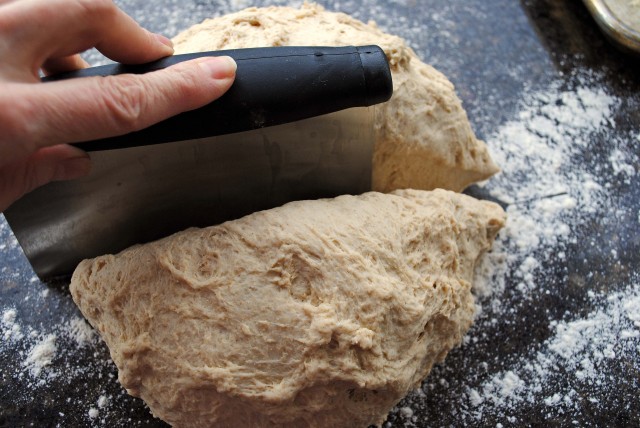 Cut the dough in half. Try to make the halves as equal in weight as possible. If you are so inclined, use a kitchen scale to help insure equal amounts of dough for both halves. I’m a kitchen scale OCD Nazi, so I weigh my dough.
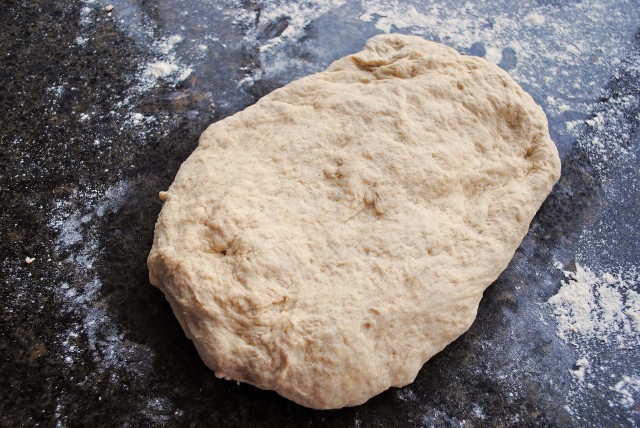 Working with one ball of dough at a time, with your hands or a rolling pin, shape each dough ball into a rectangle shape. As you can see, the rectangle of dough is a loose interpretation of a rectangle. I may have OCD issues about equal dough weight, but I have no OCD issues with shaping a “rectangle”.
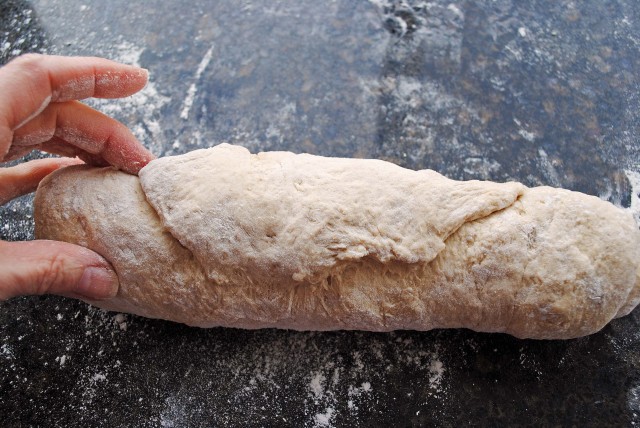 Beginning at one end of the dough, roll it up into a loaf shape. When you are rolling the dough, make sure that you roll it snugly so that there won’t be any gaps when the bread rises and bakes.
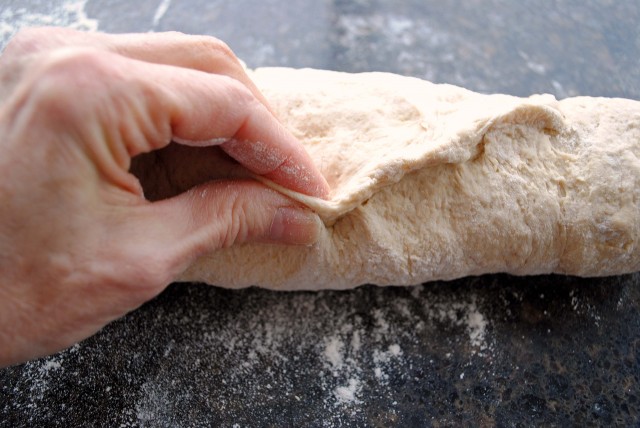 Pinch the seam closed to seal the edge to the loaf. Again, you don’t want gaps in the dough.
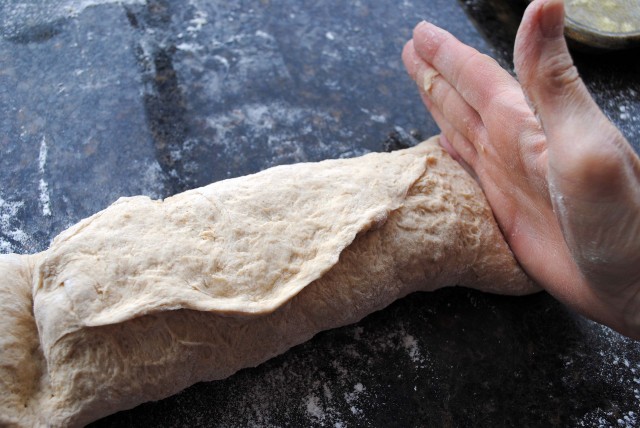 Using the edge of your hand, press down on the loaf an inch or so from each end of the loaf.
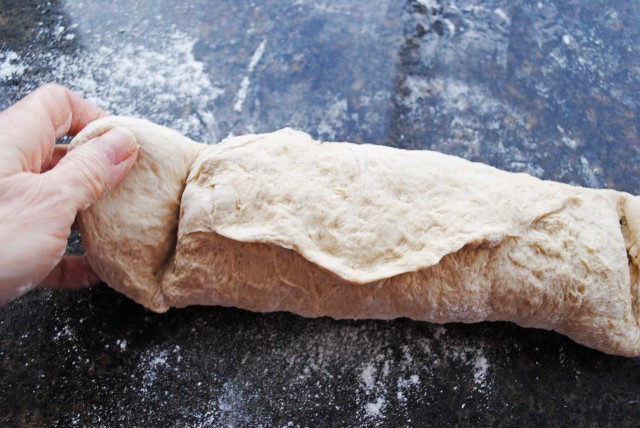 Bending the end of the dough at the mark you made, bring the ends of the dough up and across the seam.
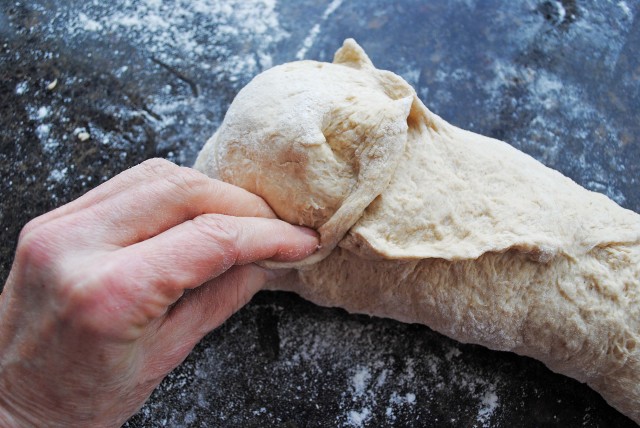 Pinch the new seam in place to hold it securely. This will give you a more uniform end. This side of the dough where all of the seams are showing, will become the bottom of the loaf. So, don’t worry about how this part looks. 🙂
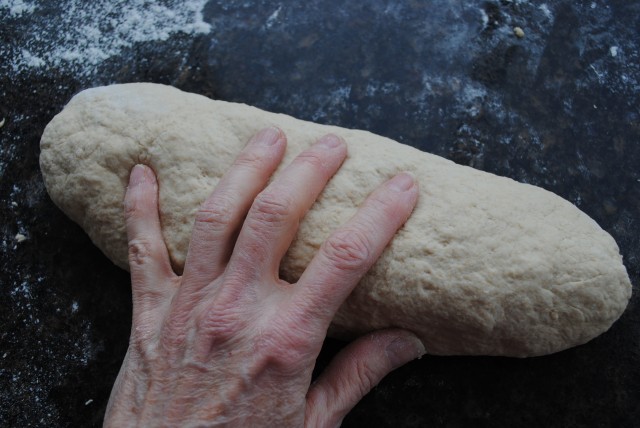 Using both hands (yes only one of my hands is showing…the other one is holding the camera), gently squeeze and roll the dough into a nice free-form loaf shape with tapered ends. Sometimes the taper looks better than other times. This particular loaf has a good taper whereas the other loaf ended up with squarish ends. Shrug.
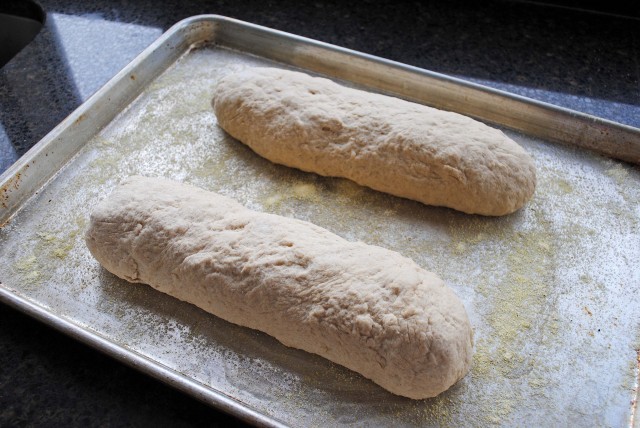 See…rustic! Place both loaves on the prepared baking sheet. Give them plenty of space between the loaves as well as space from the edges of the pan. The loaves need room to rise.
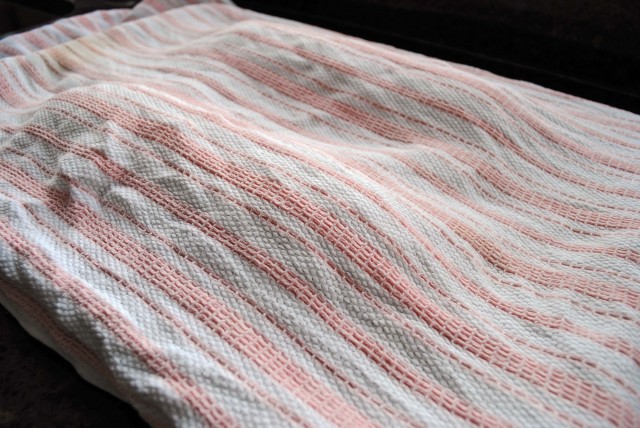 Cover the loaves with a damp kitchen towel and place in a warm place to rise. I usually get my oven a little warm by turning it on to the lowest setting for a few of minutes and then turning it off before putting the loaves in to rise. I keep the oven light turned on to help keep the oven environment warm. Be sure to take the risen loaves out of the oven before heating the oven for baking!
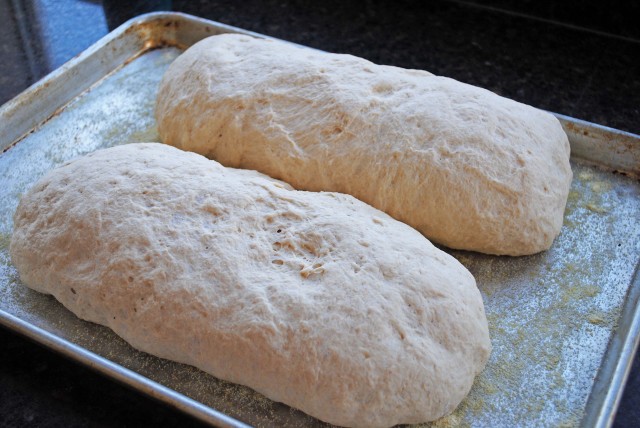 These loaves took 30-45 minutes to rise. Depending on where you live and the temperature conditions of your home, it may take up to an hour for the dough to double in bulk. I ought to have made these loaves a little bit longer because they were a tad too fat. Consequently, when they rose their sides ended up touching.
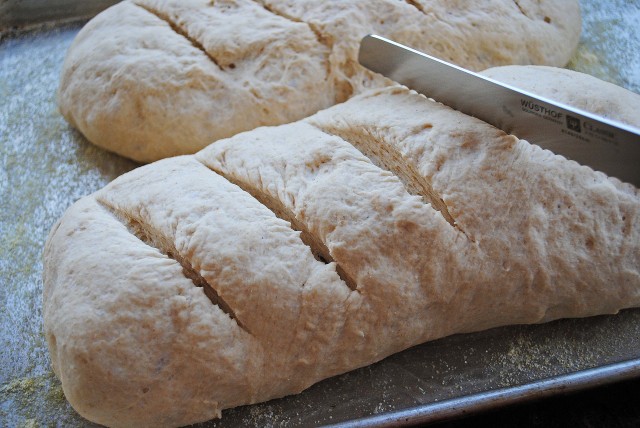 Gently cut diagonal slashes across each loaf. Don’t cut deeper than about 1/2-inch.
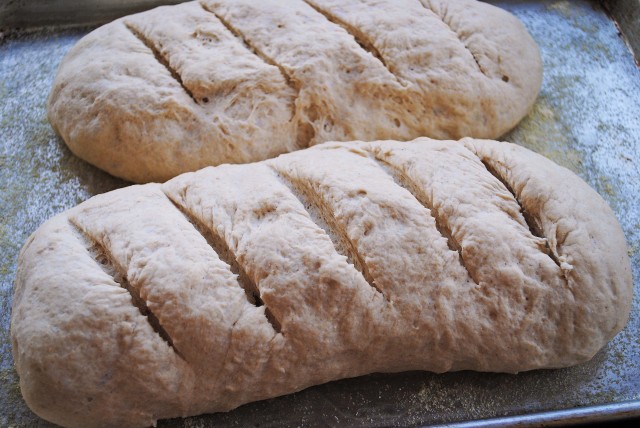 Four or five slashes is all that is needed. If you wanted to be a maverick, you could make one long slash lengthwise down the middle.
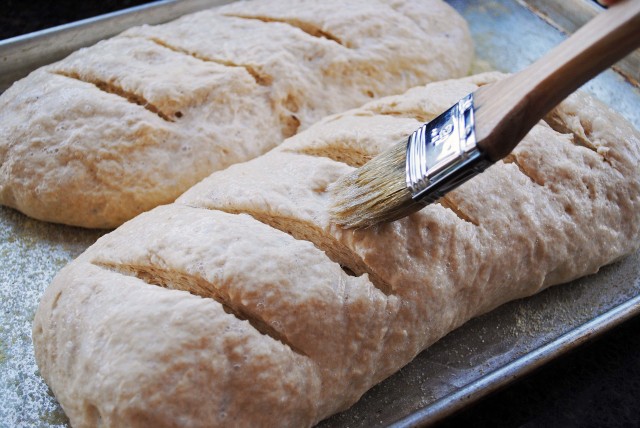
Brush each loaf with the egg white/water mixture. This will give the loaves a shiny crust when baked. It will also help the crust to be crisp. Put the bread into the oven and using a water bottle quickly, but thoroughly, spray the inside of the hot oven with water. This will form steam which adds to the crispness of the crust. Bake the bread for about 20 minutes, open the oven and spray down the bottom and sides of the oven again. More steam = crispy crust.
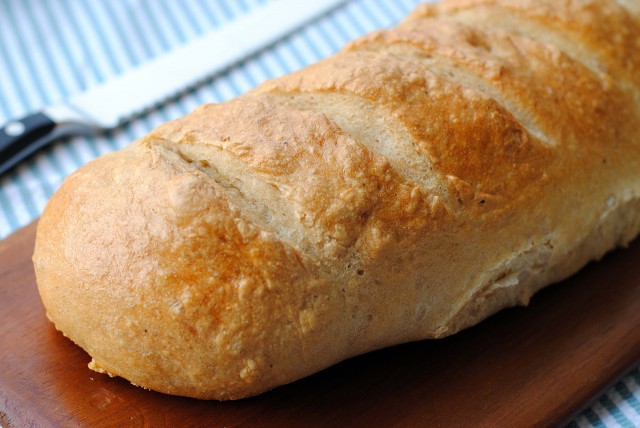
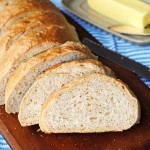
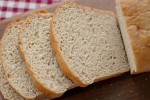
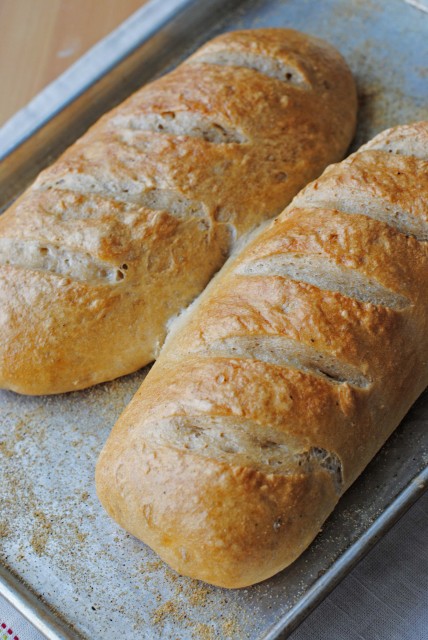 Look at these! Aren’t they beautiful? You can see how crispy the crust came out. So exciting!
/





I wish I had the baking chops to do this everyday! You are exactly right… nothing smells better than fresh baked bread wafting throughout the house. 🙂 Great job my friend. 🙂
Oh thats one beautiful and rustic looking bread there. It seems to be a workable compromise to have half white and hafl wheat…Can I use the regular wheat flour? Would your version be smooth or gritty?
Bookmarked to try soon!!!!
Shobha
Shobha, grittiness when using whole wheat flour is dependent on how fine the wheat is ground. My bread was smooth for two reasons: 1) I used part white flour and part whole wheat flour; 2) I ground my wheat fine.
You asked about using regular wheat flour. I am guessing that you mean whole wheat flour that you buy at the grocery store. There shouldn’t be a problem. Best advice, buy a reputable brand for best performance with bread. King Arthur, Bob’s Red Mill, or other similar brands will give good results.
Whether the flour is ground at a mill or at home, the grittiness of the bread will be dependent on the fineness of the flour.
So I tried this and it’s pretty good! I used half sprouted whole wheat flour and half king arthur bread flour. I used my crappy food processor for it and blended the sponge for about 2 minutes and followed the rest by the directions. I only made half recipe so I made one loaf and it was rustic and beautiful! I made the mistake of not waiting til completely cool to cut so it wasn’t perfect.
Thanks!
Thanks, Faylina. I’m with you on not being able to wait until the loaf has cooled before cutting. Every time I have made bread, there is always one sacrificial loaf that is cut while it is still piping hot. I like your idea of using sprouted wheat flour. I’ll have to give it try, too. ~Terri
Love this recipe. It’s all about the sponge! First time I used regular whole wheat from Bobs Red Mill, it was good, but the white winter wheat I’ve used the three times I’ve made this recipe since really makes a difference in texture! And the pickiest of eaters in my house (a toddler who has never seen regular white bread) loved it even though it wasn’t brown!
On a side note, if anyone is having problems finding ewhite whole wheat flour, Trader Joe’s carries it and is ground just as fine as regular AP flour.
Hi, Ida. I’m so glad that this recipe worked well for you! I love using white winter wheat flour in my baking. It’s a great way to get whole wheat past people who won’t eat whole wheat (aka my family). For people who are already fans of red winter wheat, eating bread products made with white winter wheat almost feels decadent, in a good way.
Thanks for taking the time to leave such a great and informative comment. It is very helpful for other readers. ~Terri